Tracking iframe Events with Google Tag Manager
The <iframe> HTML element represents a nested browsing context, embedding another HTML page into the current one.
Each embedded browsing context has its own session history and document. The browsing context that embeds the others is called the parent browsing context. The topmost browsing context—the one with no parent—is usually the browser window. See Mozilla’s iframe page for more information.
Tracking specific iframe events on a page with a universal pixel in GTM involves six steps:
-
Verify that the same GTM container is installed in both the parent page and the child iframe.
-
Create the iframe Listener tag.
-
Push the custom event on the child iframe form submission.
-
Trigger the custom event tag.
-
Build the amended universal pixel and ruleset in Basis.
-
Create the tag and trigger for the universal pixel in GTM.
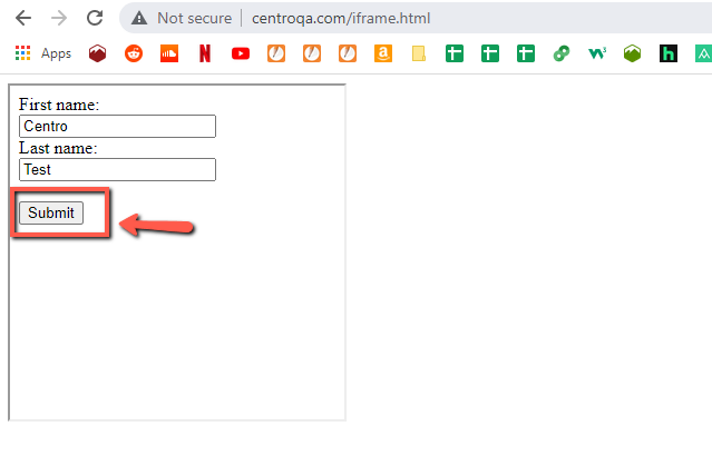
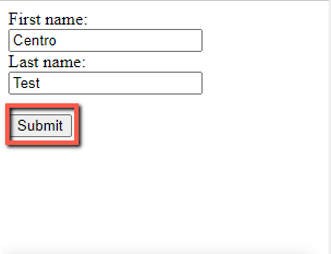
In this scenario, you'll track Submit at the end of this iframe event:
1. Verify That the Same GTM Container Is Installed in Both the Parent Page and the Child iframe.
Before creating an iframe Listener tag, install your GTM Container in both the parent page and the child iframe. See Google’s Tag Manager page for more information.
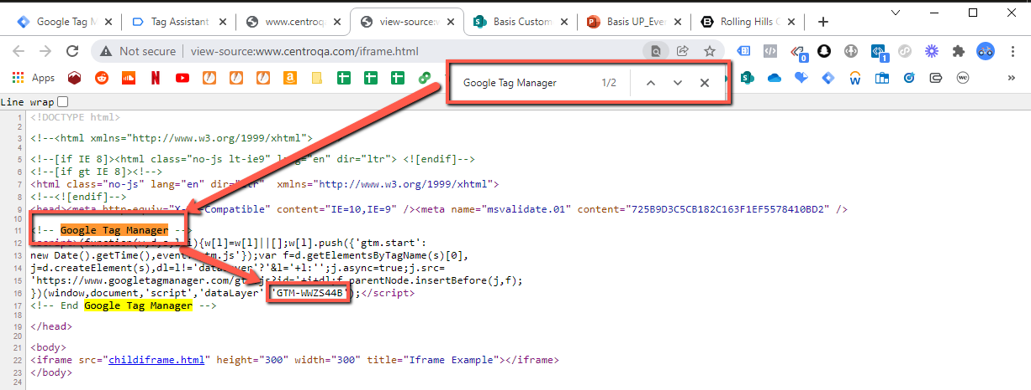
To verify the parent page's GTM container:
-
Right-click on the parent page, then select View page source.
-
Search for Google Tag Manager, then make a note of the container ID. In this scenario, the Container ID is GTM-WWZS44B.
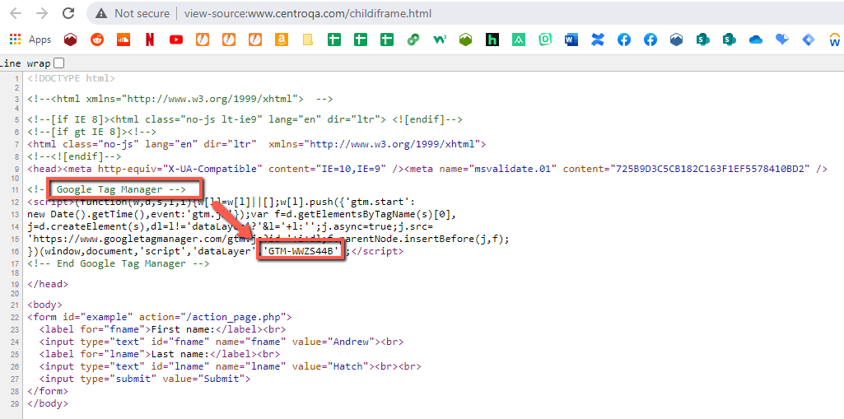
To verify the child iframe's GTM container:
-
Locate the iframe parent page.
-
Right-click on the page, then select View frame source.
-
Search for Google Tag Manager, then verify that it’s the same Container ID as the parent page. In this scenario, Container ID GTM-WWZS44B is in both the parent page and child iframe.
2. Create an iframe Listener Tag
You must install an iframe listener tag for the parent page to recognize events happening in the child iframe. The following script should be implemented across all pages and can be used without alteration:
<script type="text/javascript">
                (function(window) {
                addEvent(window, 'message', function(message) {
                try{
                var data = JSON.parse(message.data);
                var dataLayer = window.dataLayer || (window.dataLayer = []);
                if (data.event) {
                dataLayer.push({
                'event': data.event,
                'postMessageData': data
                });
                }
                }catch(e){}
                });

                //Cross-Browser event listener
                function addEvent(el, evt, fn){
                if (el.addEventListener) {
                el.addEventListener(evt, fn);
                } else if (el.attachEvent){
                el.attachEvent('on' + evt, function(evt) {
                fn.call(el, evt);
                });
                } else if (typeof el['on' + evt] === 'undefined' || el['on' + evt] === null) {
                el['on' + evt] = function(evt) {
                fn.call(el, evt);
                };
                }
                }
                })(window);
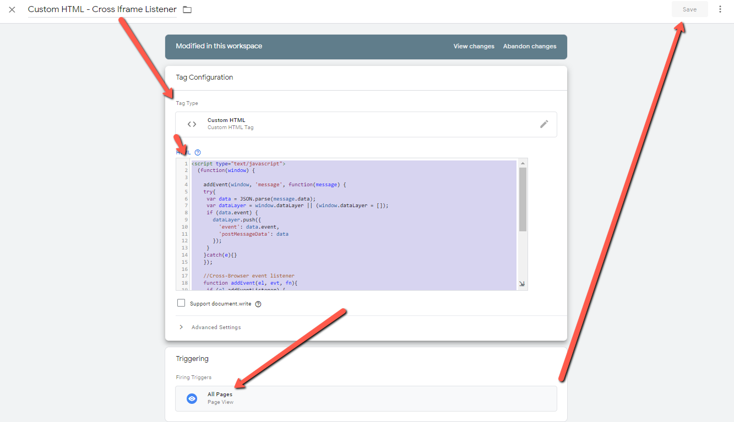
</script>To create an iframe Listener Tag:
-
Log in to GTM.
-
On GTM's Workspace, go to Tags, then select New.
-
Select the Tag Configuration box, then select the Custom HTML tag.
-
Paste the script into the HTML body.
-
Select the Triggering box.
-
Select the All Pages trigger.
-
Enter a new name for the tag.
-
Select Save.
3. Push a Custom Event on the Child iframe Form Submission
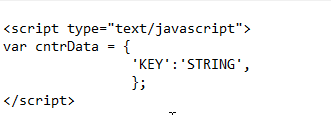
Use the following script to push a custom event on the parent page that’s triggered on the child iframe form submission:
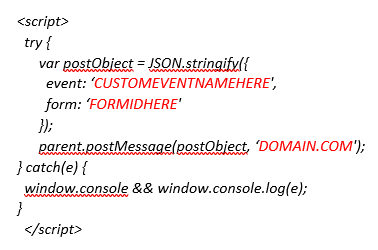
Update the "event:," "form;," and "postObject;" variables accordingly:
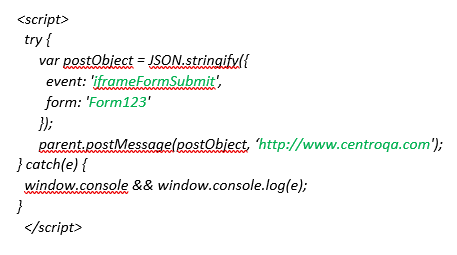
To push a custom event on the child iframe form submission:
-
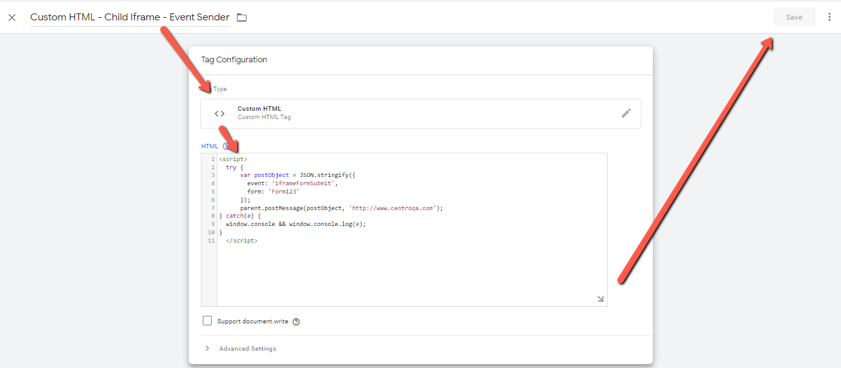
Create a new Custom HTML tag.
-
Paste the script into the HTML Body.
-
Select Save.
4. Triggering a Custom Event Tag
First, identify the triggering variables that uniquely cause the Form Fill in the iframe to fire.
To trigger the custom event tag:
-
Set GTM to Preview mode.

-
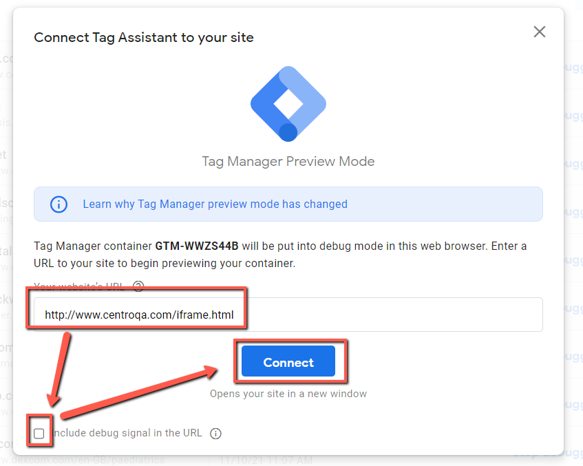
Enter the URL of the page where the iframe lives in the Your website's URL field.
-
Clear Include debug signal in the URL.
-
Select Connect. A window opens with the specified page.
-
Select Continue.
-
In the window with the specified page, complete the form, then select Submit.
-
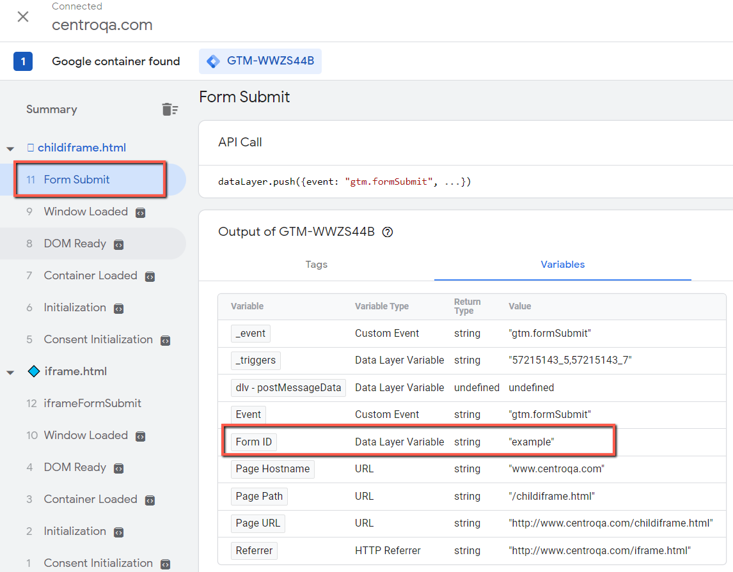
In Tag Assistant’s Summary panel, locate and select the first Form Submit event, which is numbered and grouped with the page where the click occurred. Since you only selected Submit once, you know this is the iframe event associated with this page.
-
Select the Variables tab to identify your triggering variables. In this case, look for Form ID. We recommend taking a screenshot of the variables to use as a reference when creating a new trigger.
-
On GTM's Workspace, select Triggers, then select New to create a new trigger.

-
Name the new trigger.
-
Select the Trigger Configuration box, then select Form Submission.
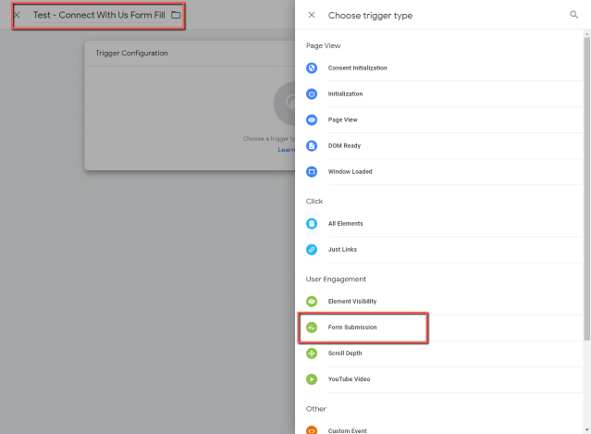
Triggering your scenario may differ.
-
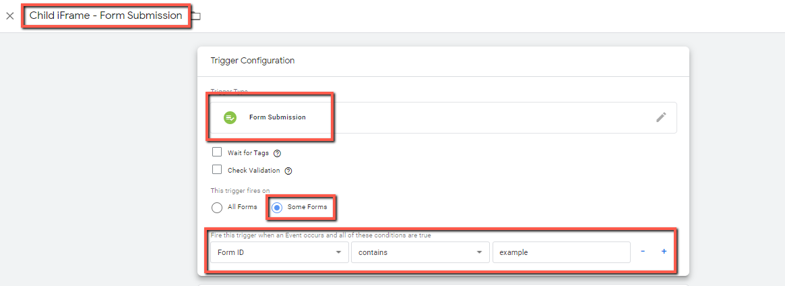
Select Some Forms to set what the trigger fires on, then refer to your screenshot to configure the rest of the trigger using the previously mentioned variables.
-
Select Save to create the trigger.
-
After you create the trigger, apply it to the child iframe Event Sender tag.
-
On GTM's Workspace, select Tags.
-
Select the new tag.
-
Select the Triggering box.
-
Select Add [
 ] to apply the new trigger.
 -
Select the Search icon, then enter the trigger’s name.
-
Select the trigger.

-
Select Save.
-
5. Build the Amended Universal Pixel and Rule Set in Basis
Universal pixels can act as conversion pixels and audience pixels on multiple pages at once. This lets you use a single pixel on different pages on your website, and even place that pixel before your conversions or audiences are set up. See Universal Pixels for more information.
To track this iframe event with a universal pixel, you must use the Key/String rule set in Basis.
To create a universal pixel:
-
In Basis, go to the media plan:
-
Go to Main Menu [
 ] > Campaigns.
- Select the campaign and media plan.
-
Go to Main Menu [
-
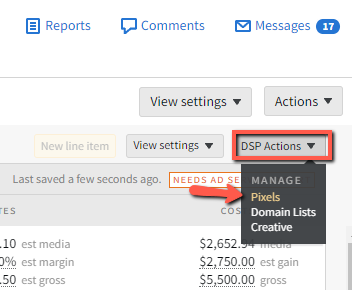
Select DSP Actions > Pixels on the upper-right corner of the DSP line items to create the universal pixel for this iframe event.
-
Select the Universal Pixels tab.

-
Select Create universal pixel.
-
Enter a Pixel Name.
-
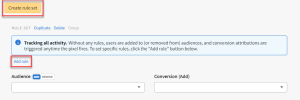
Select Create rule set.
- Select Add rule to create a new Key/String rule to capture this iframe event.
-
Set the Type to Key/String and Operator to Exactly Matches.
Keys and strings are case sensitive variables that are set to any alphanumeric values. They must exactly match the universal pixel’s rule set.
-
Enter the Key and String. The variables for this scenario are iframe and submit.
We don’t recommend leaving spaces in the key or string. They can render incorrectly as the pixel loads in the browser.

-
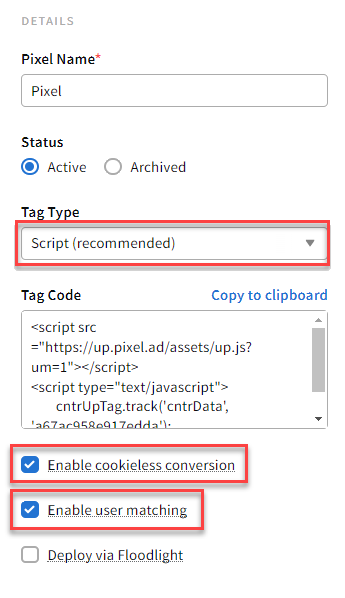
Confirm that the Tag Type is set to Script. Using the script pixel lets users take advantage of user matching and cookieless conversion attribution.
-
Copy the Tag Code.
-
Select Save to create the universal pixel. This universal pixel is now ready to be placed in GTM.
6. Create a Tag and Trigger for your Universal Pixel in GTM
After you install your GTM Container on all pages of your site, create a tag. A tag is made up of two components: tag configuration and triggering. Tags are segments of code provided by analytics, marketing, and support vendors to help you integrate their products into your websites or mobile apps. With GTM, you no longer need to add these tags directly to your projects. You configure and publish tags from within GTM. See Google’s About Tags page for more information.
To create a tag:
-
On GTM's Workspace, select Tags, then select New.
-
Enter a name for the new tag.
-
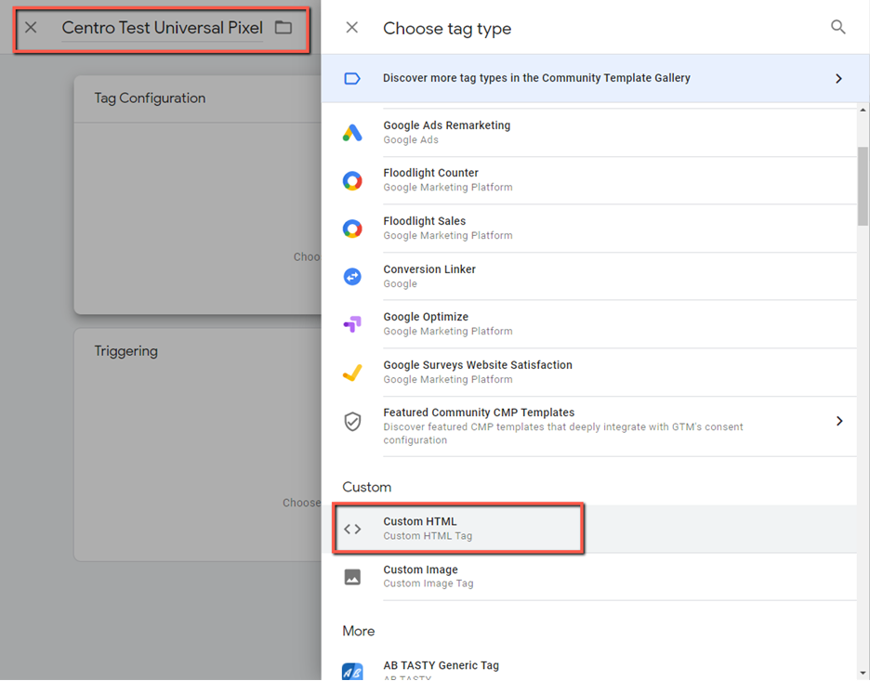
Select Tag Configuration to open Choose tag type.
-
In the Custom section, select Custom HTML.
-
Paste your universal pixel’s tag code into the HTML box.
-
Add the ?key=string amendment to the tag code, which is bolded in the following examples:
-
The following screenshot is an example:
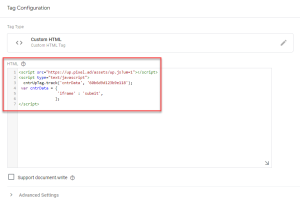
-
The following screenshot is an example:
-
Select Save to create a new tag for the universal pixel.
After you create a tag, create and apply a trigger to your universal pixel. A trigger scans your web page or mobile app for certain types of events like form submissions, button clicks, or page views. The trigger tells the tag to fire when the specified event is detected. Every tag must have at least one trigger to fire. See Google’s About Triggers page for more information.
To create and apply a trigger:
-
On GTM’s Workspace, select Preview to identify the triggering variables that cause the iframe event to fire. Tag Assistant opens.
Tag Assistant helps you verify that you have installed various Google tags correctly on your page. Tag Assistant tells you which tags are present, reports any errors, and suggests improvements that can be made to your implementation on any page. See Google’s Tag Assistant page for more information.

-
In Your website’s URL, enter the URL of the page where the iframe is located.
-
Clear Include debug signal in the URL. This can cause issues with Landing page view pixels firing.
-
Select Connect. A new window with the specified page opens.
-
Select Continue.
-
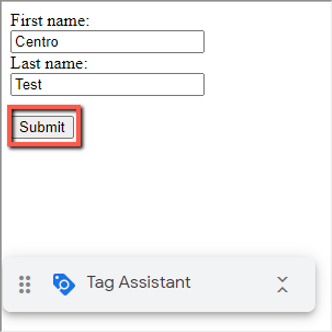
In the new window of the specified page, select Submit one time.
-
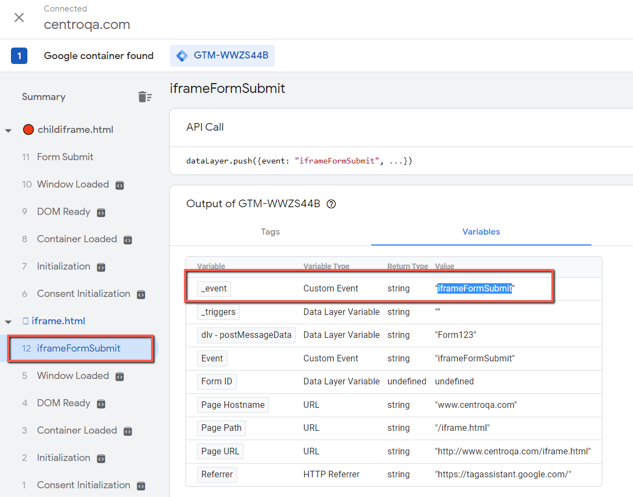
In Tag Assistant’s Summary, locate and select the first iFrameFormSubmit event, which is numbered and grouped with the page where the click occurred. Since you only selected the button once, you know this is the iframe event associated with Submit.
-
Select Variables to locate your triggering variable. In this case, look for _event. We recommend taking a screenshot of the variable to use as a reference when creating a new trigger.
-
On GTM’s Workspace, select Triggers.
-
Select New to create a new trigger.

-
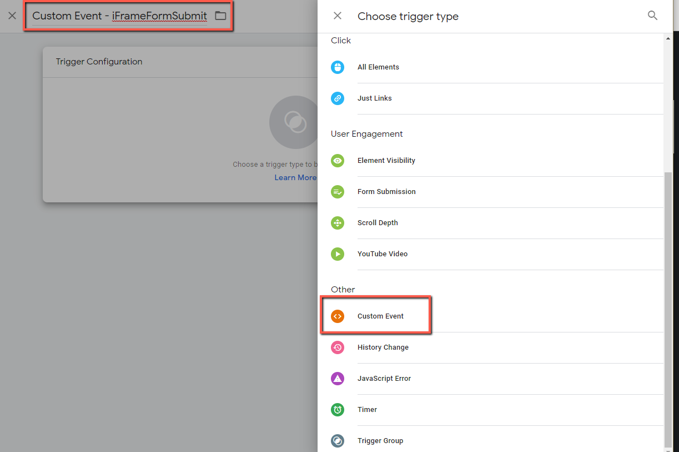
Select Tag Configuration to open the Choose trigger type panel.
-
In the Other section, select Custom Event.
-
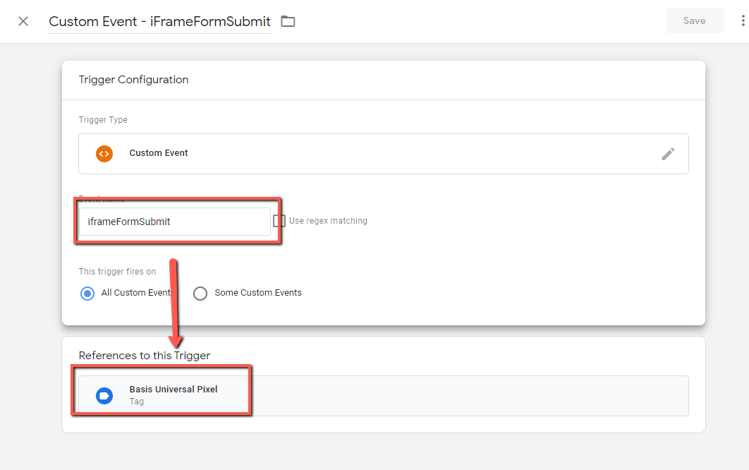
Enter a name for the new trigger.
-
Enter the Event Name using the variable from your screenshot.
-
Select All Custom Events to set what the trigger fires on.
-
Select Save.
-
After you create the new trigger, apply it to the universal pixel.
- On GTM's Workspace , select Tags.
- Select the new tag.
- Select Triggering.
-
Select Add [
 ] to apply the new trigger.
- Select the Search icon, then enter the trigger’s name.
- Select the trigger.
- Select Save. The trigger is now applied to the universal pixel. You’re now tracking a specific iframe event with a universal pixel.
QA – How to Check if the Universal Pixel Is Firing in Chrome
After the GTM container has been published, check if the universal pixel is firing on all pages correctly in a live environment.
To check if your universal pixel is firing in Chrome:
-
In Google Chrome, select Chrome’s Menu icon > More tools > Developer tools (Ctrl+Shift+I) on the page being tracked to open the Developer tools panel.
-
Select the Network tab.
-
Search for the key value, iframe=submit in this case, then fill and submit the form to see if the universal pixel fires in real time.
