Universal Pixels
![]()
Check out our AdTech Academy Course to learn more!
Universal pixels can act as conversion pixels and audience pixels on multiple pages at once. This lets you use a single pixel on different pages on your website, and even place that pixel before your conversions or audiences are set up.
For example, you might want to:
- add visitors to your sale page to an audience
- count users who make a purchase as a conversion
- count users who sign up for your mailing list as a separate conversion while also adding them to an audience
With universal pixels, you can place a single pixel on as many pages as you'd like to track or as part of your site template, if applicable, and then set up rules to determine which page fired the pixel and take an appropriate action.
Every rule pairs a URL or part of a URL with an audience, conversion, or both. Let's say you wanted to use a pixel to add visitors to your sale page to an audience, as well as tracking a conversion for users who made a purchase. You would place a pixel on both the sale page:
https://www.mysite.com/sale.htm
and the thank-you page for purchases:
https://www.mysite.com/shop/thankyou.htm
You would then create two rules for the pixel:
- one that looks for the sale page and adds those users to your audience
- one that looks for the thank-you page and counts the conversion
Rules can add users to multiple audiences, count multiple conversions, or add users to audiences and count conversions at the same time.
Universal pixels are scoped at the brand level--use the universal pixels you create for any tactic in a campaign for that brand.
Using a Universal Pixel with Your Tactics
1. Place the Pixel on Any Pages You Want to Track
Before you run your campaigns, get the universal pixel tag code and place it on any pages you'd like to track on your website. You can use the same pixel on multiple pages.
Ideally, you should place the pixel on all of your website's pages. At a minimum, the pixel should fire from landing pages and pages where conversions and audiences are tracked. If your site uses a template, place the universal pixel code in the template so that all of your pages fire the pixel.
If the pixel you want to use doesn't already exist, create it first. See Creating a New Universal Pixel.
To place a universal pixel tag on your website:
-
Go to Main Menu [
 ] > Pixels & Audiences.
 -
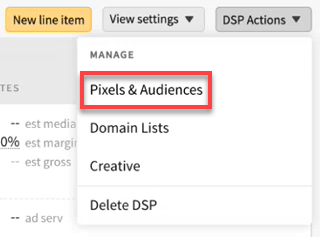
Select a brand. Use search, sort, or filters to find your brand.
-
If you already added a DSP line item to a campaign, you can access pixels and audiences from the media plan by selecting DSP Actions > Pixels & Audiences from the line item.
-
-
Select the Universal Pixels tab.
-
Click the name of the pixel you want to add to your website to view its details.
-
If you already know the audiences and conversions you want to link to the pixel, click Create rule set, then select the audiences and conversions. You can also do this when you set up the pixel rules after you've added the tag to your website. See Universal Pixel Rules for more information.
-
Select the Tag Type you want to use: Script or HTML Image.
Under normal circumstances, you should use script tags. When you use image tags, Enable user matching is not available and page URL detection is limited. See Image Tags below for more information.
-
Copy the Tag Code. Select and copy the code in the text box or click Copy to clipboard.
If you are deploying the Universal Pixel via a Campaign Manager 360 Floodlight container tag, select Deploy Via Floodlight before you copy the code. This ensures that code includes the script required to collect revenue, transaction ID, custom variables, and page URL from Floodlight.
-
Place the pixel script anywhere in the HEAD or BODY section of your website pages or site templates. You can place the pixel on as many pages as you like. See Universal Pixel Script for more information on placing the pixel script and JavaScript for data objects into your webpages.
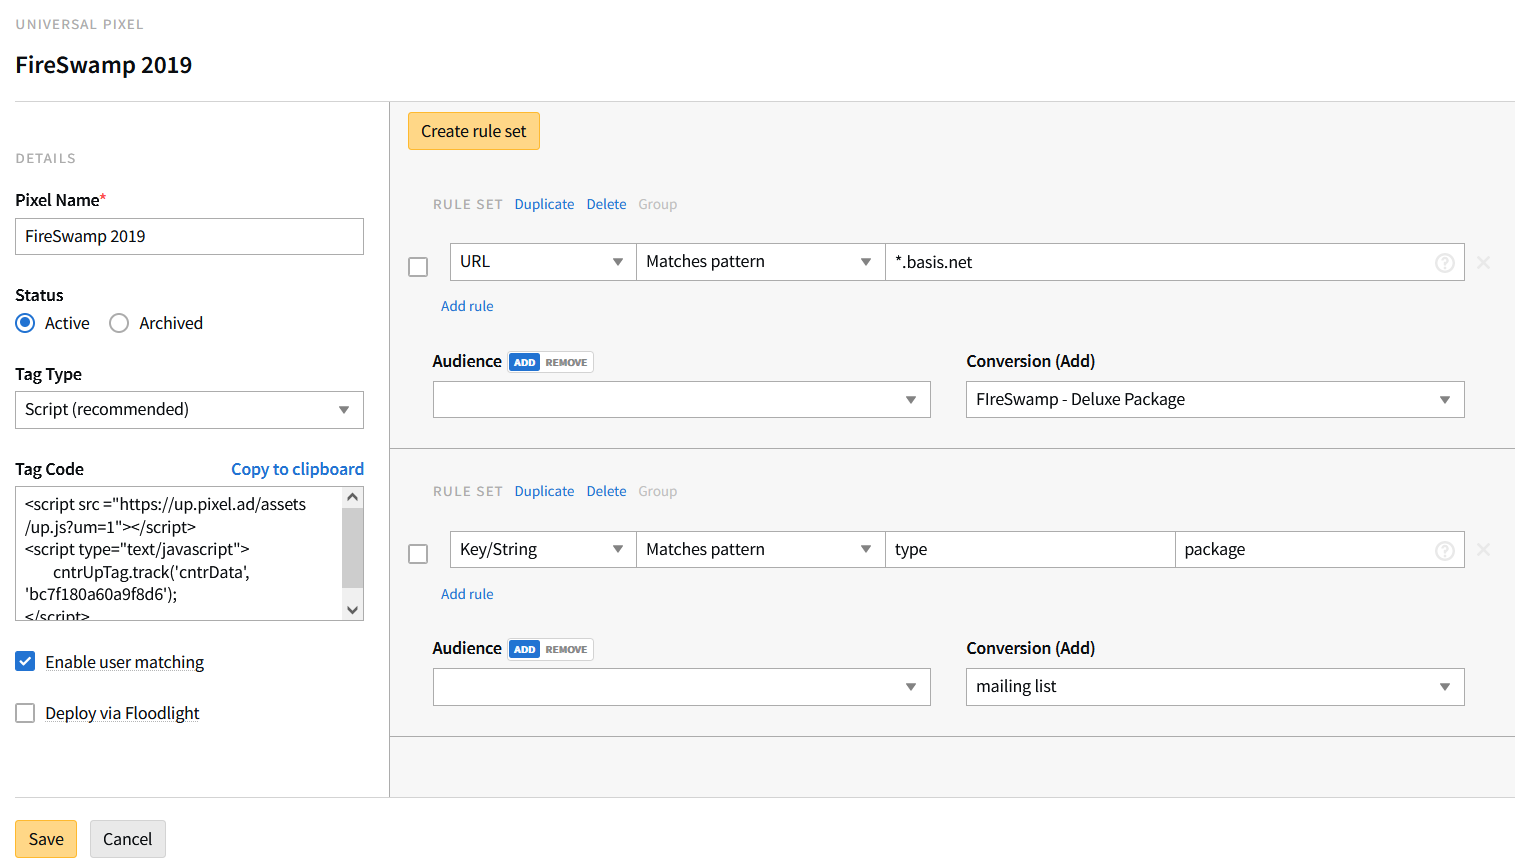
Image Tags
When you use an image tag, user matching is not available, and page URL detection is limited to the Referer header that the browser sends. As a result, page URL detection will not work as expected if the image is not included directly on the page (for example, if it is loaded into an iframe).
You can also use the URL from the Image Tag when using universal pixels to send mobile app data. Extract just the URL from the src attribute of the image tag. In this case, you must use the cntr_ifa key or postback parameters. An IFA enables audience collection and conversion attribution, while a postback enables conversion attribution with the assistance of a mobile tracking platform. For more information about postback conversions, see Postback Conversion Tracking.
2. Set Up Pixel Rules
By default, a universal pixel tracks all activity. You can control the pixel's tracking activity with rules, which control when the pixel fires and updates the linked audiences and conversions. See Universal Pixel Rules for information about setting up universal pixel rules.
To ensure that your conversion and audience settings run as intended in the EU, and to see how Basis behaves in accordance with local laws and regulations, see Local Laws and Regulations.