Postback Conversion Tracking
With postback conversion tracking, you can see conversion reporting in Basis DSP without having to rely on browser cookies. This lets you track conversions even when you cannot place a conversion pixel or when the conversion happens outside of a browser. Examples include an affiliate network tracking platform like HasOffers or an app tracking platform like AppsFlyer.
When you use postbacks, configure Basis DSP and your tracking platform to send the right information to each other:
-
The DSP tactic's's click URL sends the postback ID to the tracking platform.
-
The tracking platform sends the postback ID to the DSP when a conversion takes place.
How Postback Conversion Tracking Works
Postback conversion tracking uses server-to-server calls to pass information between two systems, Basis and a tracking platform.
As an example, let's say we want to track app installations as our conversion. Since app installs don't happen in a web browser, we can't use a conversion pixel. Instead, we need an app tracking platform, which can determine when the conversion takes place, attribute the conversion to a click, and then report the conversion to Basis DSP using a postback.
Before the tactic runs:
-
The app developer chooses a tracking vendor and install its SDK when they design the app. The developer should write the app so that it makes a call to the tracking vendor when it first opens.
-
The DSP user creates a conversion and notes the details.
-
In the tracking vendor's UI, someone configures the postback. Usually, this is done by simply selecting Basis DSP from a list and entering the details from the previous step. The tracking vendor will supply a click URL to be used for the tactic.
-
The Basis DSP user uses this click URL as the destination URL for the ads. It's populated with macros that cause Basis DSP to pass important values, including the postback ID, to the tracking vendor on click.
When the tactic goes live, here's what happens:
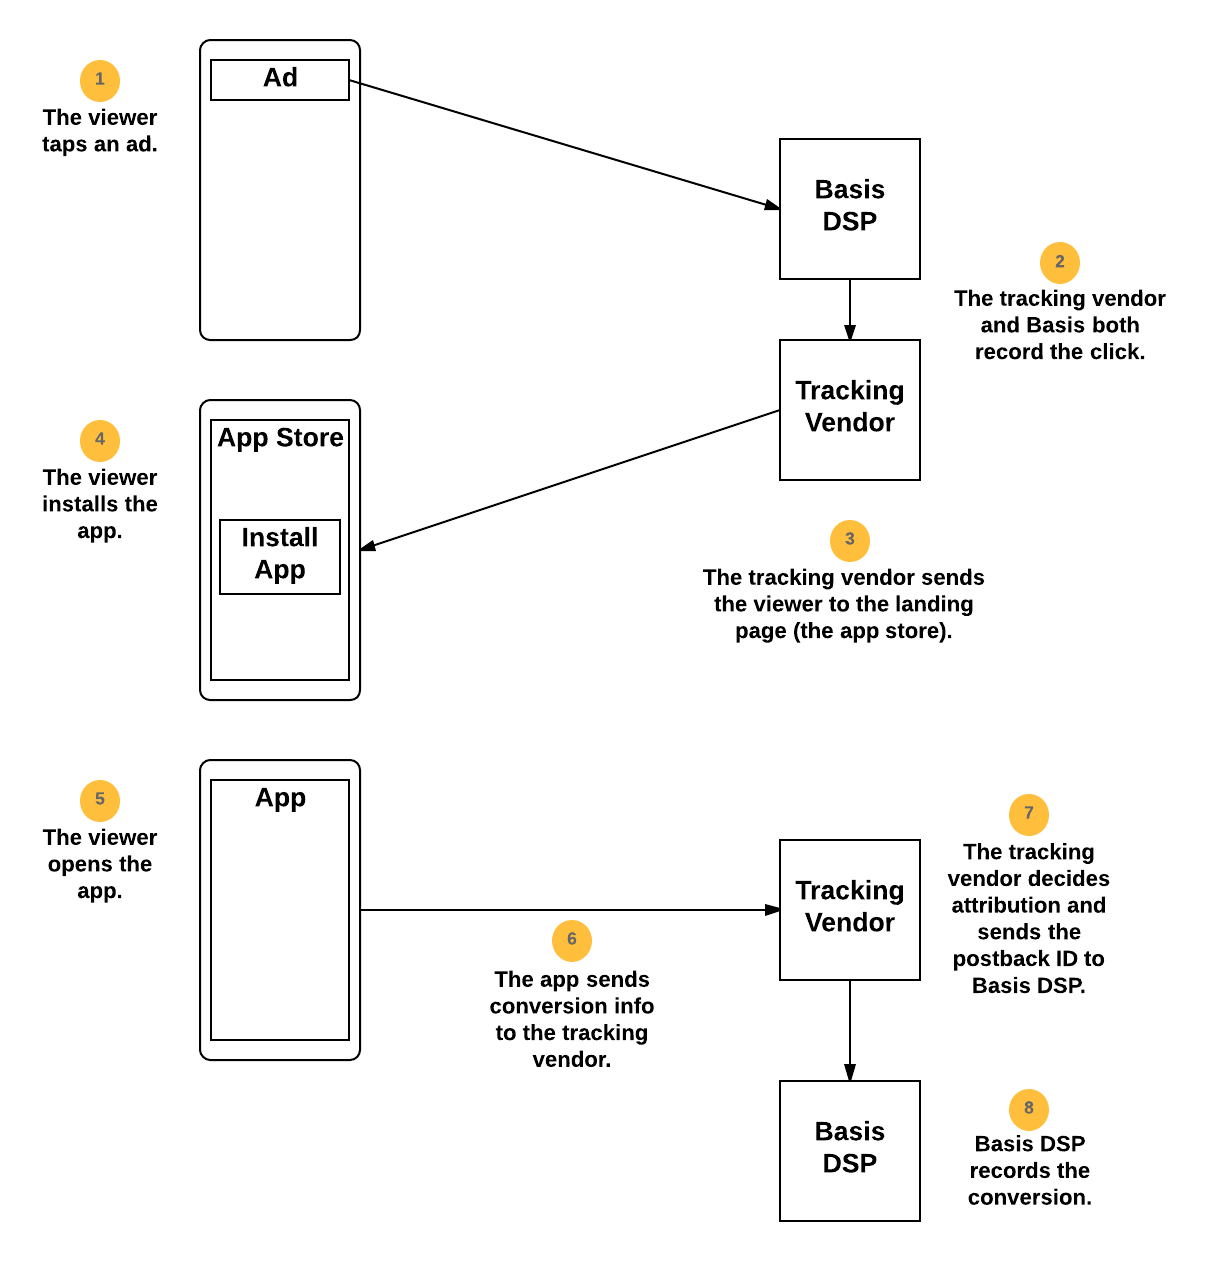
The "postback" happens in step 7, when the tracking vendor sends the postback ID to Basis DSP.
Setting Up Postback Conversions
The setup steps on both the tracking vendor side and DSP side are all essential for postback tracking to work: essential information must flow in both directions from one system to the other. The following steps are written from the perspective of the DSP user.
To set up postback conversions:
-
Determine which tracking vendor to use for the tactic.
You will need to inquire with the agency or app publisher you are running the tactic for. If you are also the app publisher, then you or a colleague should know what tracking vendor is being used.
Setup is simplified for many tracking vendors, as they provide templates for ease of implementation. If a tracking vendor does not offer a template for Basis DSP, you can request this by contacting DSP support and introducing us to an appropriate person at the tracking vendor--most vendors are happy to do this. You will find support pre-configured in some tracking vendors:
- Tune Attribution Analytics (formerly MobileAppTracking by Tune)
- Kochava
- AppsFlyer
- Adjust
- Flurry
- Apsalar
- Lithient
The DSP may be labeled "Centro" or "SiteScout" in the tracking vendor's UI. The Centro or SiteScout option will work even if you are on Basis DSP.
-
In Basis DSP: Select a conversion pixel and collect the conversion code or URL as appropriate.
-
Go to Main Menu [
 ] > Pixels & Audiences.
 -
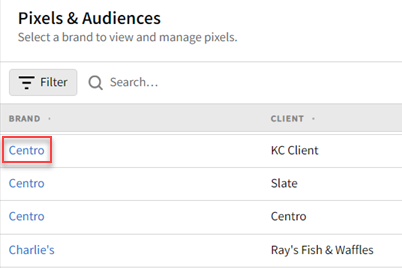
Select a brand. Use search, sort, or filters to find your brand.
-
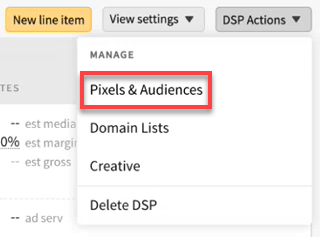
If you already added a DSP line item to a campaign, you can access pixels and audiences from the media plan by selecting DSP Actions > Pixels & Audiences from the line item.
-
-
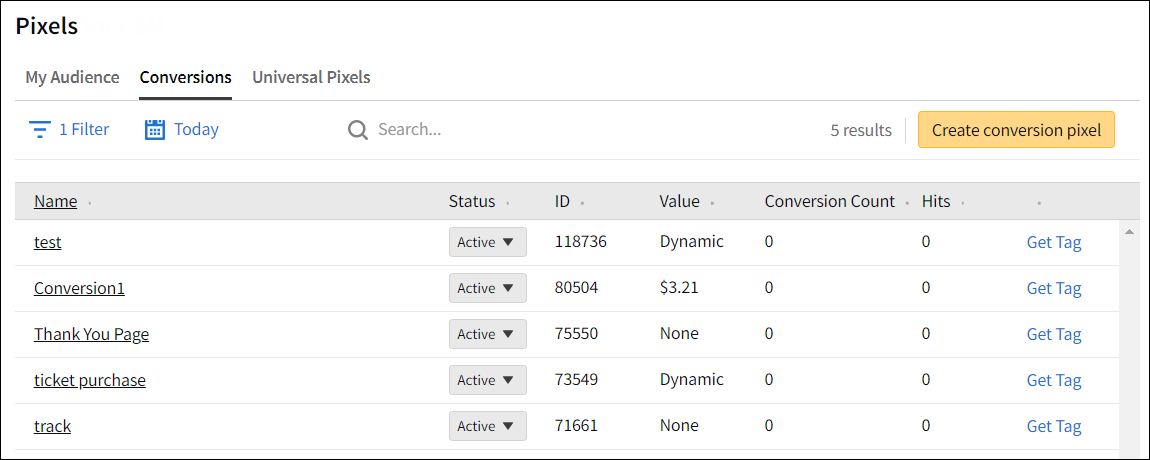
Select the Conversions tab to see your conversion pixels.
-
Click the name of the conversion you want to use or click Create conversion pixel to create a new pixel.
-
Select the Tag code tab.
-
For the Tag Type, select Postback.
-
Then, either copy the entire tag code or just the URL. This depends on the tracking platform you're using.
For the URL, replace the text "POSTBACK_GOES_HERE" with the variable from your tracking platform. The example below uses the macro "%%clickId%%" to pass postback, but consult your tracking platform's documentation for the correct string to use:
http://clickserv.sitescout.com/conv/840c6ca8a0c0e953?pb=%%clickId%%
-
-
In the tracking platform: Configure the postback and create a campaign/click URL.
Unless you are also the app publisher, this step will be done by the agency or app publisher you are running the tactic for. You can find details to share with the agency or app publisher on the pages for each tracking platform above.
-
In Basis DSP: Upload your ads and configure your tactics. See Adding New Creatives and Tactics Overview.
-
When you upload your ads, use the URL provided by the tracking platform as the click URL, and make sure to test your ads on the preview page. They should click through to the app store.
-
When you're setting up your tactics, make sure to track conversions with the conversion pixel you created earlier. The only special consideration may be that some platforms require the presence of a mobile advertising identifier (IFA) to successfully attribute a conversion.
If a mobile advertising identifier (IFA) is required, make sure that the tactic is targeting phones and tablets, and that Target only trackable devices is enabled. See Device Targeting (Tactic Editor) to learn more about tactic device targeting options.
-
Postback Tracking with Dynamic Values
Dynamic revenue tracking is also supported for postback conversions. Depending on the tracking platform, this may be handled automatically. If you will be handling this manually, pattern this on the example below. The insertions are highlighted in red.
https://clickserv.sitescout.com/conv/9f993feab6e8f84a/[INSERT-REVENUE-HERE]?pb=POSTBACK_GOES_HERE