Manually Uploading Non-Integrated Delivery Sources
Basis accepts any non-integrated delivery sources, such as a site-sourced campaign. For these sources, you need to manually upload a CSV report from the ad server.
Before you begin:
Basis can support any delivery source, but for sources not already integrated, such as a site-served campaign, you need to manually upload a CSV report.
To ensure your report can be uploaded:
Retrieve your delivery data report as a .csv file from your Ad server.
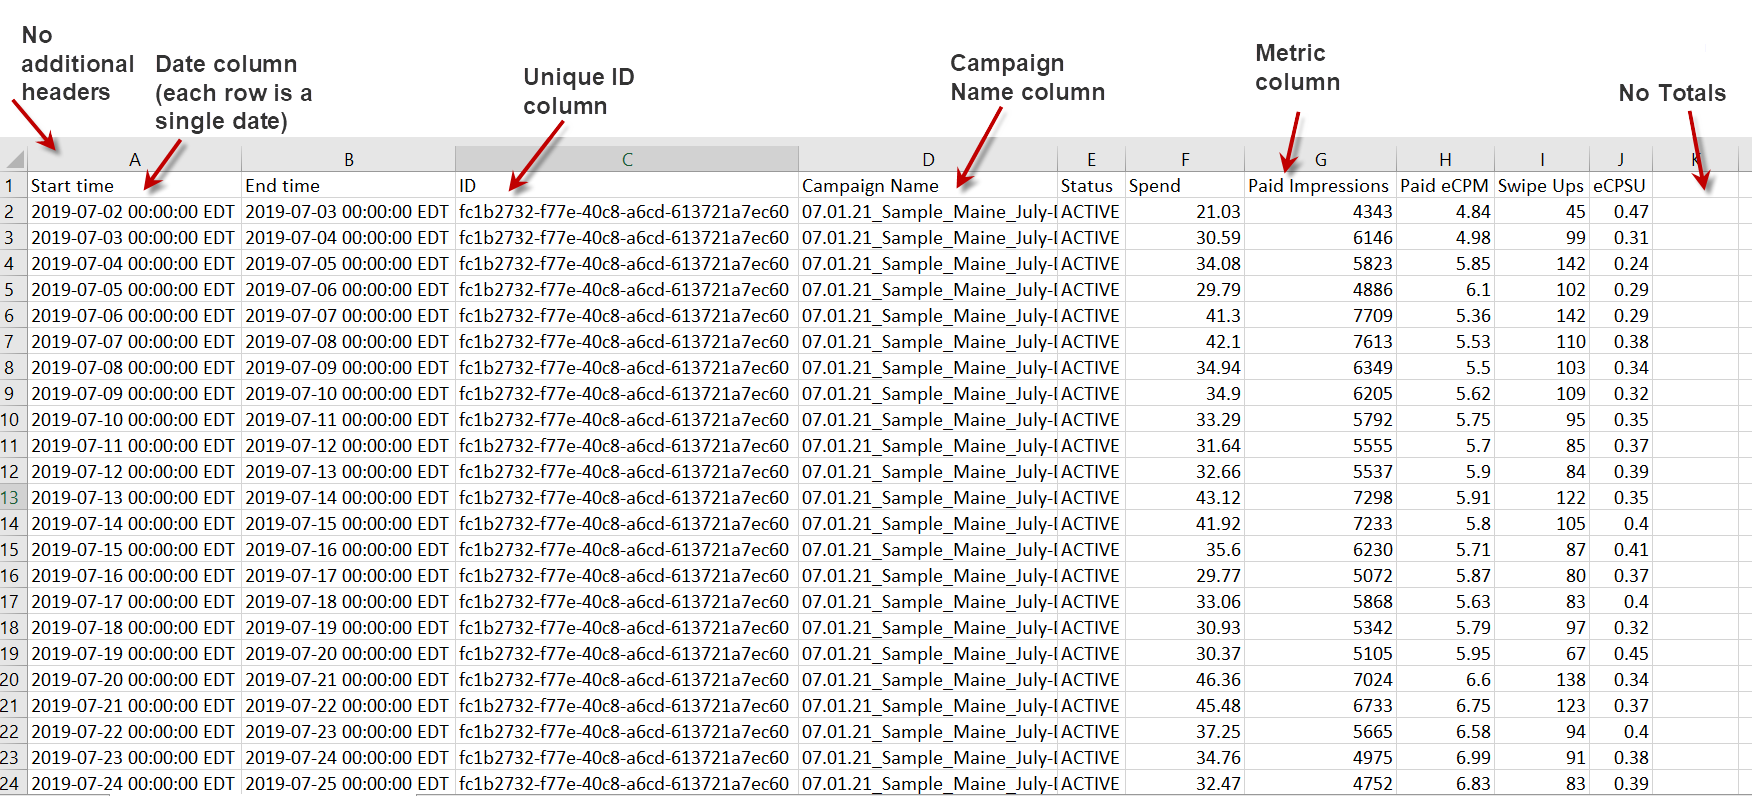
The report must adhere to the following:
Be broken out by day.
Include Date, Unique ID, and Campaign Name columns.
Each row represents a single day of delivery for a campaign. There must be a single row for each Unique ID and Date.
Has at least one delivery metric.
For a full list of accepted columns, see Delivery Source Fields and Metrics.
Remove any report headers—lines that are before column headers, and any row totals and subtotals. Report headers and totals rows will prevent the report from uploading.
Report Example
Uploading the CSV report
Upload delivery sources for non-integrated third-party services using a CSV file. Ensure your report is in the proper format before you upload.
To upload sources using a CSV file:
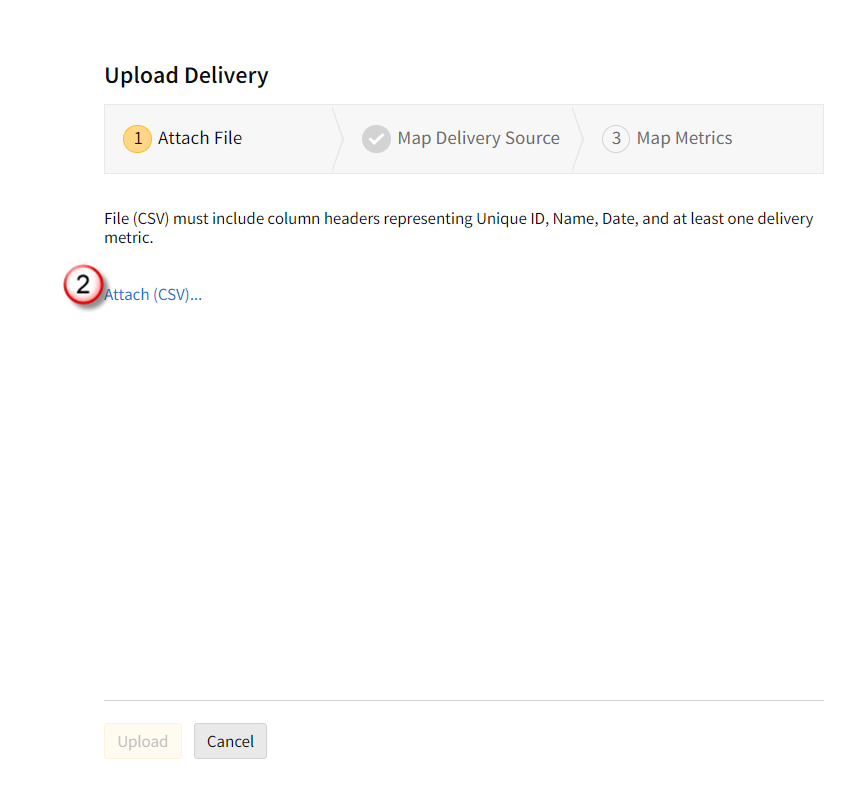
Open your campaign, go to the Delivery tab and click Upload Delivery.

Click Attach (CSV)...
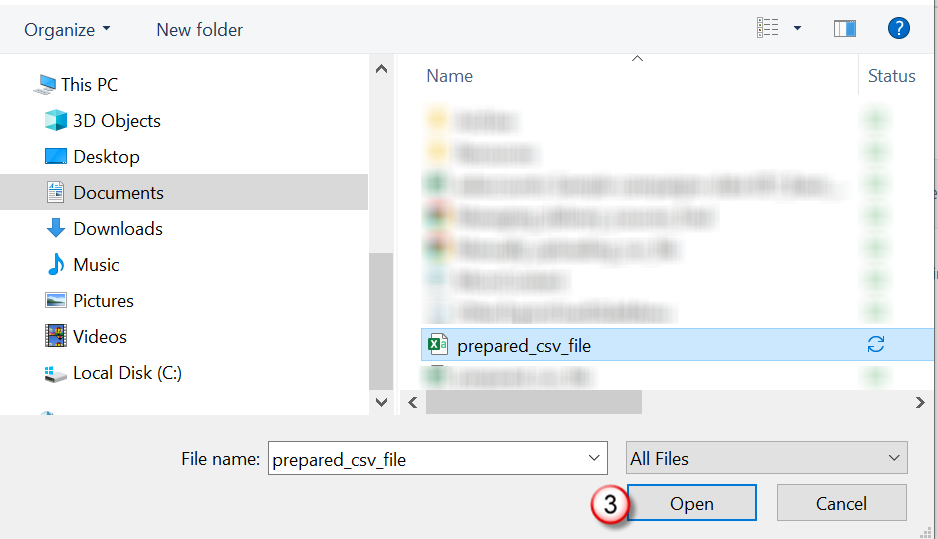
Navigate to the report's folder, select your report, and click Open.
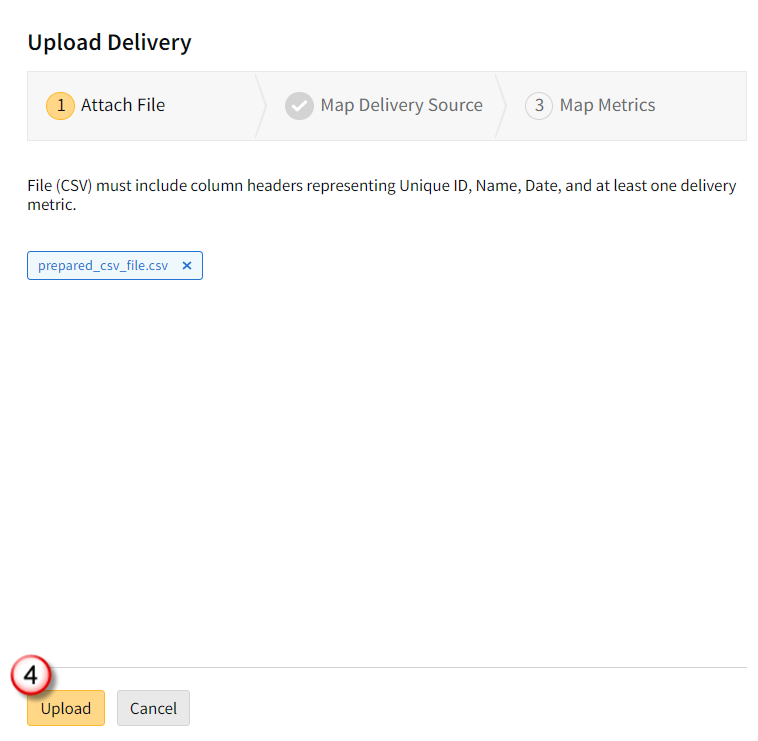
If any reports were previously uploaded (up to five), they are populated in the Upload Delivery modal. Click Upload to upload the new file.
After you receive a confirmation message that your file has been successfully uploaded, click Next.
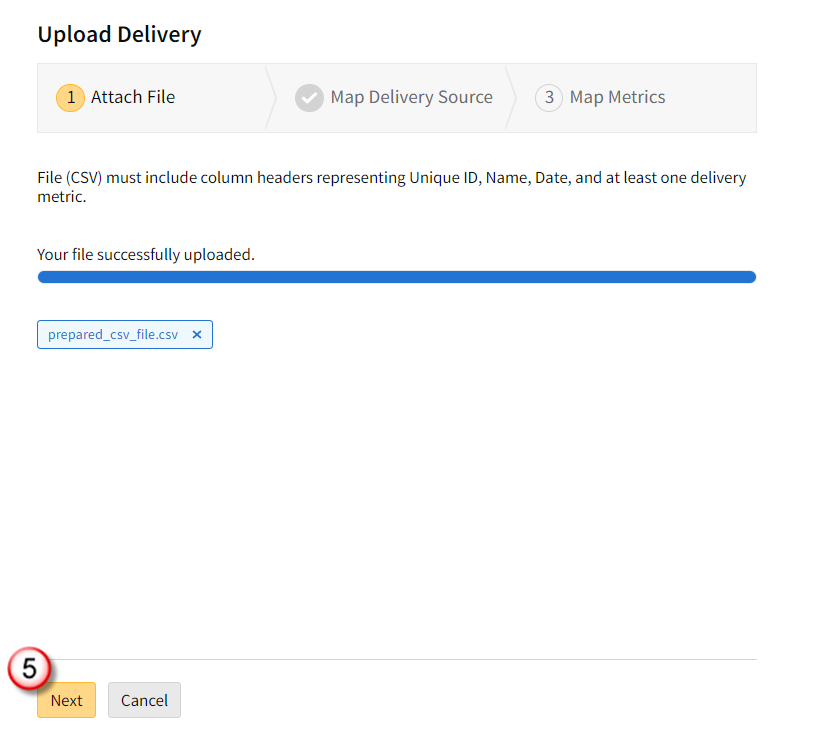
If you receive an error message, make sure that the CSV file follows the guidelines mentioned above.
Match Report Columns to Basis Fields
In the Upload Delivery modal, select where the CSV column headers from the report should populate in the available Basis Platform fields.
To map your column headers to the corresponding Basis fields:
Click the .CSV COLUMNS drop-down on the right to view all the headers from the uploaded CSV file.
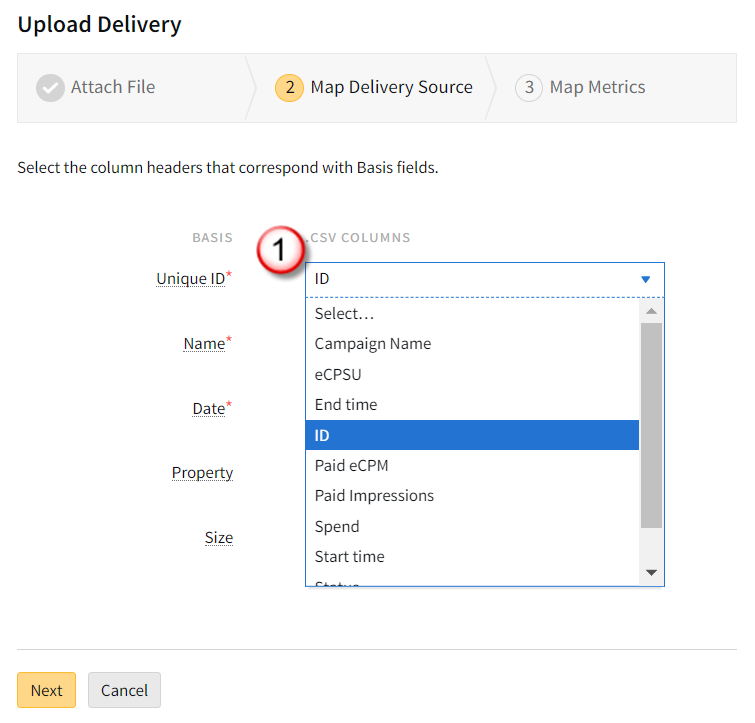
Select the field that corresponds to the Basis field on the left. For example, select ID from the drop-down next to Unique ID if you want the ID field from the report to populate in the Unique ID field in Basis.
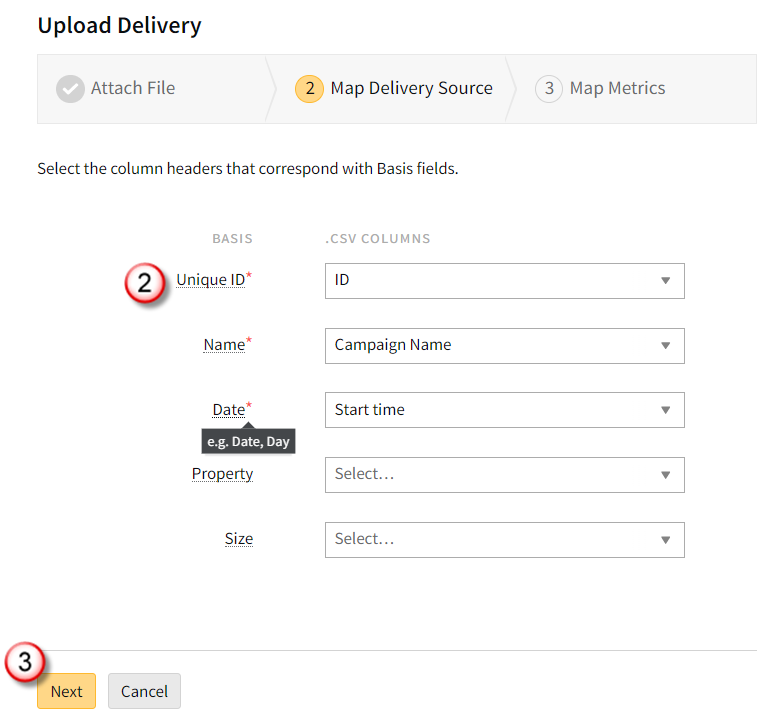
Only Unique ID, Name, and Date are required fields.
Example Report Field Matching
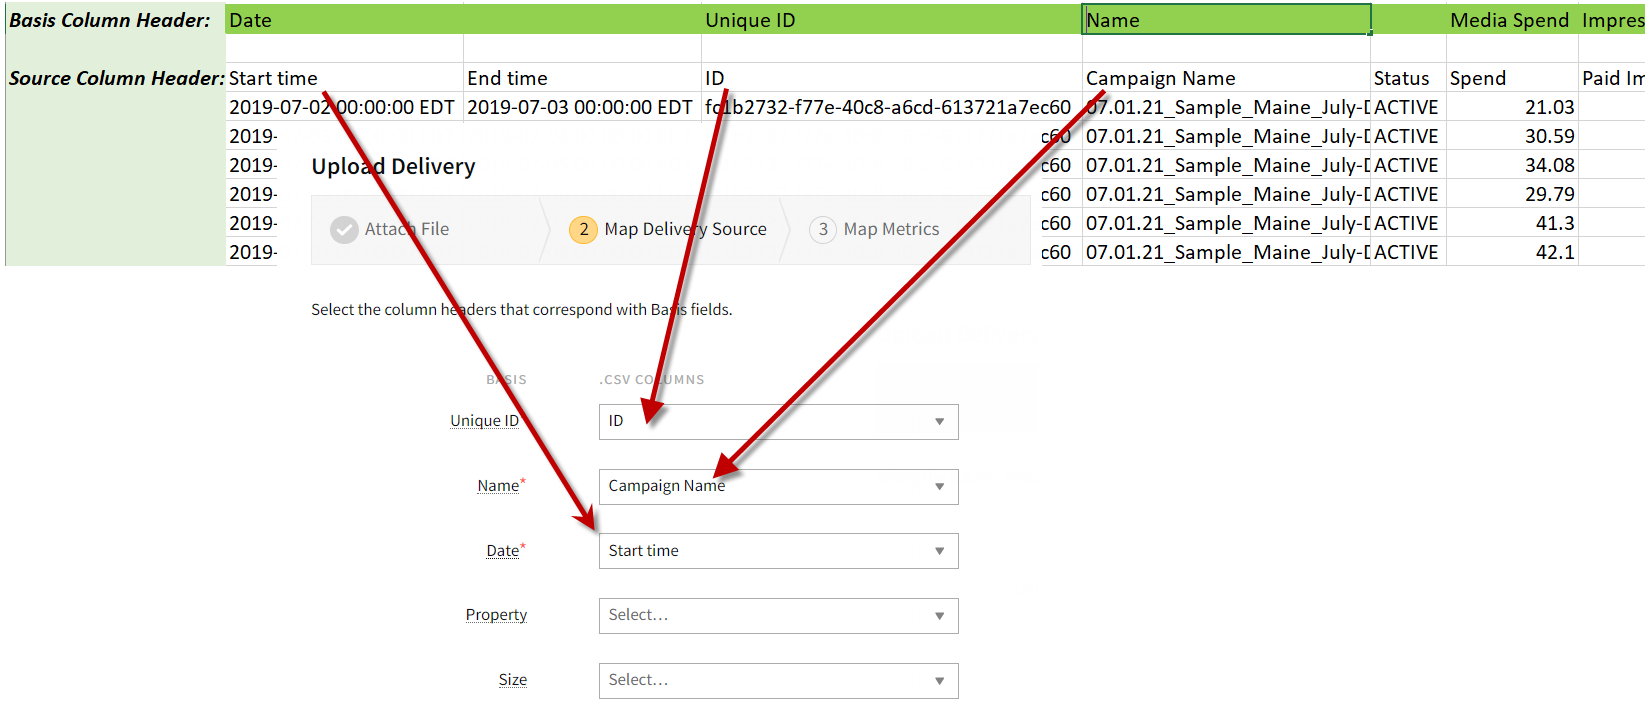
Make all your selections, and click Next.
Hover over the red asterisk for a tool tip of suggested column matches.
Map Metrics
Select where you want the data from your CSV report to populate in the corresponding Basis metrics fields.
To map your CSV report metrics:
Click on the drop-down to view all the headers from the uploaded CSV report.
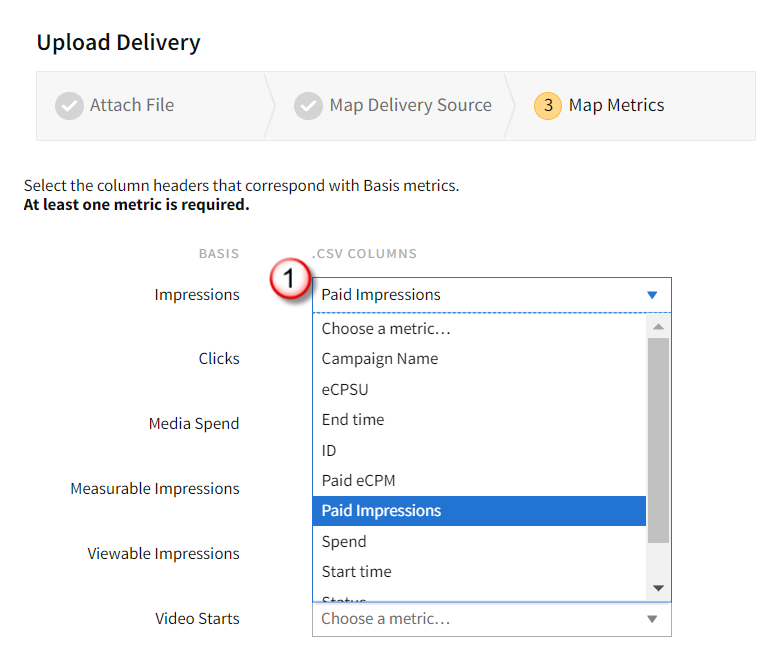
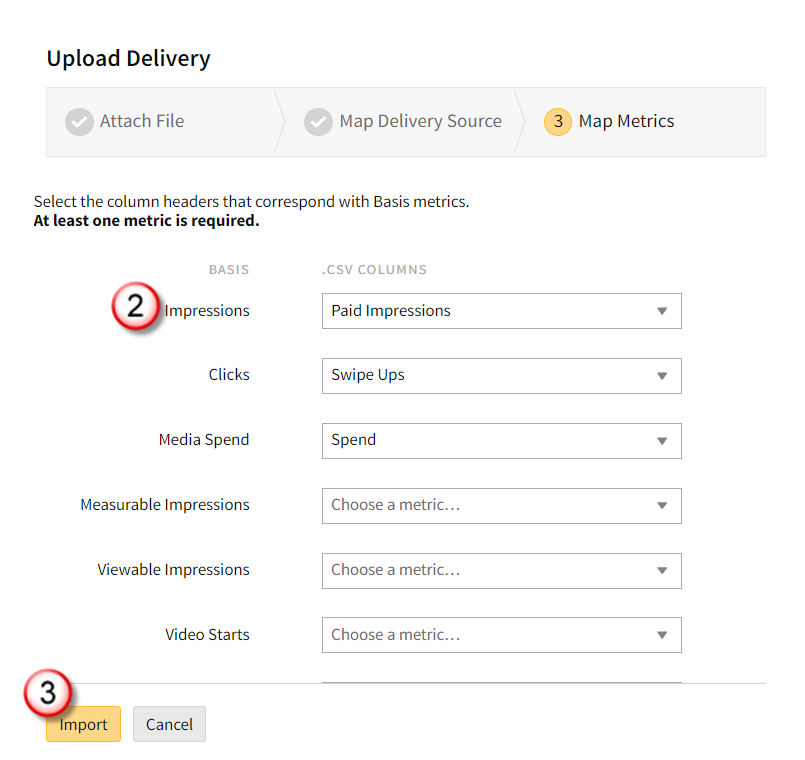
Select the metric you want to populate in the corresponding Basis field. For example, select Paid Impressions from the drop-down next to the Impressions field if you want that metric to populate in the Impressions field in Basis.
After you have made all your selections, click Import.
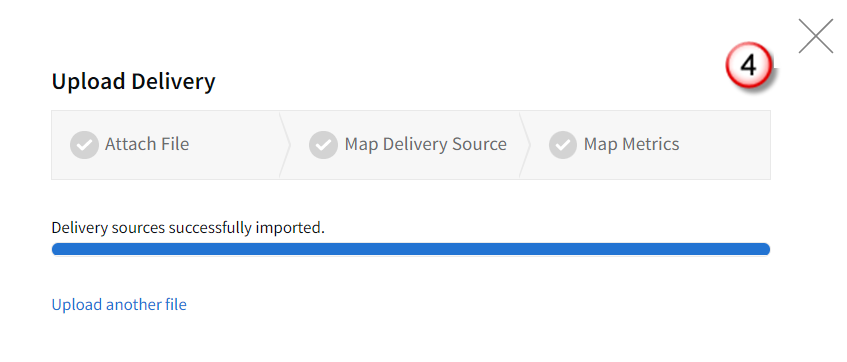
A confirmation screen appears. You can then click Close [
 ] to close the window, or click Upload another file if you want to upload another report for this campaign.
Your file now appears in the Delivery Sources section of the Delivery tab.

Next Steps
You can now map delivery sources to line items, select metrics, and track conversions. See the Managing Delivery Sources Quick Reference Guide for more information on managing your delivery sources.