Adding, Editing, and Deleting Dashboard Filters
When you add, delete, or edit a dashboard filter when the dashboard is in edit mode, and save the changes, everyone who has access to the dashboard will see the updated version you saved.
Dashboard filters override tile filters if the filter is for the exact same field. See Data Canvas Dashboard Filters for more information.
When viewing a dashboard, you can also temporarily update dashboard filter values, which doesn't affect any other users.
External users can temporarily update dashboard filters, but can't edit tile filters. If you want to lock the data external users can see, such as dates, you should add a tile filter.
To add a dashboard filter:
-
Go to Main Menu [
 ] > Data Canvas, and select your client.
 -
Select the dashboard from the dashboard list.
-
Select Edit dashboard from the dashboard's Options [
 ].
].-
There must be at least one tile on your dashboard in order to add a filter.
-
-
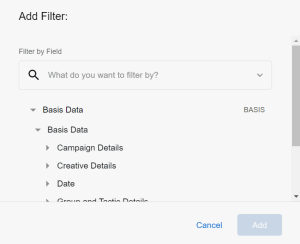
Click Filters in the top toolbar, and select Add Filter.
-
An Add Filter modal opens pre-populated with fields from the Basis Data Explore. You can use the search bar to find the field you want to filter by, or you can select it from the dropdown menu.
-
You will receive an alert if you select a field that is already being used by another filter. While you can still create the filter, you cannot apply multiple filters that use the same field to the same dashboard tile.
-
-
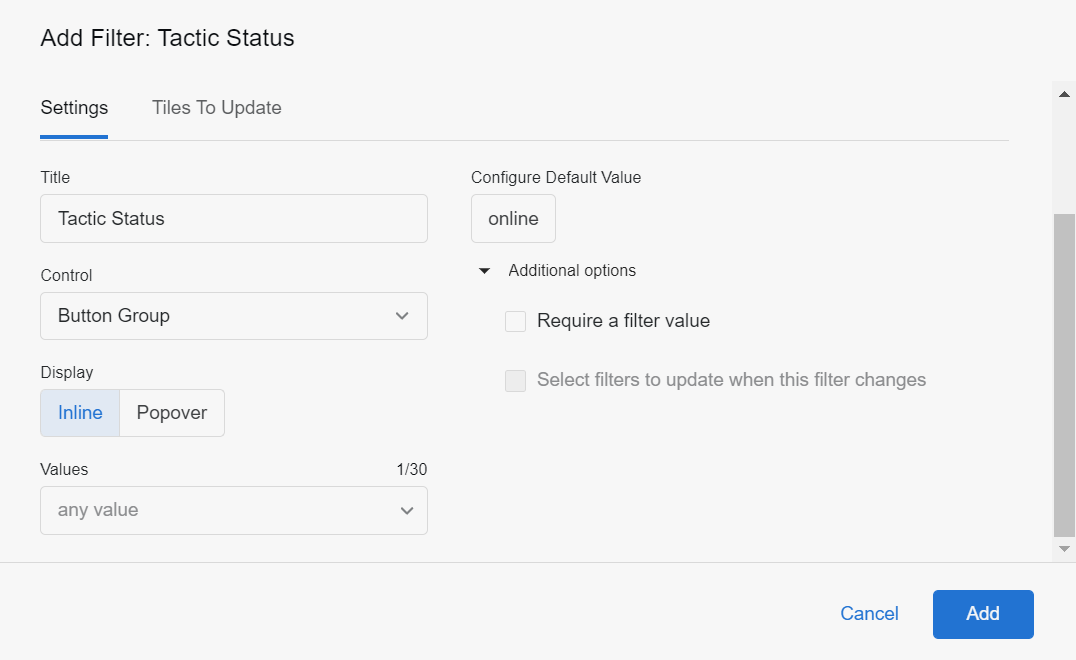
After you select the field you want to filter by, a filter configuration modal appears where you can customize your filter settings.

The following describes the filter setting options:
-
Title: Enter the title of the filter as you want it to show on the dashboard. The title option pre-populates with the name of the filter-by field.
-
Control: Select from a list of control types, which vary depending on the type of data you are filtering.
-
Display: For controls that can show as either inline or popover, select how the filter will appear. If a control can be displayed only in one way, this option does not appear. See Displaying Filters for more information.
-
Values: To set specific value options for the filter, choose from the dropdown or enter the value options in this field. Leave blank to allow value options from the database to be surfaced, up to the maximum number of values available for that control. For numeric data, this field is replaced by Min and Max fields.
-
Configure Default Value: Optionally, set the default value for the filter.
-
Require a filter value: Select the checkbox to require a value for the filter.
-
Select filters to update when this filter changes: Select the checkbox to link other filters to this filter. If there are no other filters on the dashboard, this option is disabled.
-
Add and Cancel: Click one of these buttons to save or cancel the new filter.
-
-
Complete the Tiles to Update tab, which determines which tiles read the filter.
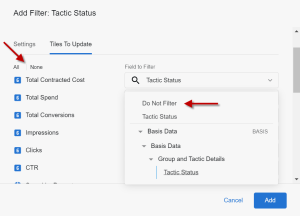
By default, the filter is automatically applied to any tiles created from the Basis Explore, and sets the value of Field to Filter to the same field as the field chosen for the filter. The following options are also available:
-
Select All or None to turn the filter on or off for all tiles.
-
In the Field to Filter section, for each tile, choose which field is affected by the filter, or choose not to apply the filter to an individual tile.
-
If you select a field that is already used in an existing filter, any tiles filtered by the existing filter are unavailable to the new filter.
-
-
Select Add or Cancel to save or cancel the new filter.


Advanced Filters
An advanced filter can be applied to all types of data and provides additional flexibility in the filter conditions you can set up.
Advanced filters, dates, and times
While there are several filter controls that allow filtering on dates, you can also use advanced filters with dates. In the condition options, select complete days, complete weeks, and so on, to select ranges that don't include the current time period. This is unlike the timeframe filter control, which includes the current time period.
Advanced filters also let you select time values, such as hours, minutes, seconds, and so on.
Using advanced filters
To create an advanced filter:
-
Go to the filter configuration modal.
-
Select Advanced in the Control field.
-
The Configure Default Value dropdown on the lef populates with appropriate filter condition options for the type of data you’re filtering, such as is, contains, or starts with. Filters on types of data, such as number or date types, show different condition options.
-
After you’ve selected your filter condition option, select a value to the right, which is populated with values from your database. Alternatively, you can type a value to receive a suggestion.
-
Optional: Enter a value yourself, then click Enter to create a value.
-
To remove a condition, click Delete [
 ] next to that condition.
 -
Click Add to add your filter.
Displaying Dashboard Filters
How filters appear is set in the Location field of the filter configuration modal. Dashboard filters can appear in the following ways:
-
Inline: The filter is shown directly in the top bar of the dashboard.
-
Popover: A summary value is shown in the top bar of the dashboard. Click the value to see the full filter.
-
Placed behind a More button: A More button appears in the top bar of the dashboard with an indicator showing the number of filters it contains. Click More to see the filters and their values.
Most filter controls can be shown as inline or popover orientation through the Display field in the filter configuration modal.
Some filter controls can only be shown as inline orientation; when you view a dashboard with these filter controls, you won’t see a Display field in the filter modal. These filter controls are:
-
Dropdown Menu
-
Single Day
-
Timeframes
-
Date Range
Additionally, some filter controls can be only be shown in popover orientation. When you view a dashboard with these filter controls, you won’t see a Display field in the filter configuration modal. These filter controls are:
-
Tag List
-
Advanced
You can place any type of filter behind More by dragging the filter into the button after the filter is created. If all filters are behind More, the button changes to the word Filters.
We recommend that important or frequently used filters are set as inline or popover, and less frequently used filters are set to overflow.
Editing and Deleting Dashboard Filters
To edit your existing filters:
-
Go to your dashboard's edit mode.
-
Click Options [
] next to the filter.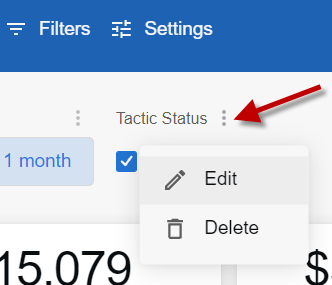
-
Select Edit.
-
In the Filter configuration modal, update the filter-by field, the filter’s settings, or the tiles to update.
-
Select Update to save your changes or Cancel to cancel your changes.
-
After you edit filters, click Update on the dashboard to apply the new filter settings to the tiles.
-
Click Save in the blue toolbar to save your changes and exit edit mode.
If you want to change the default timeframe filter of a template, select Edit from the filter's Options [![]() ]. You can then customze the timeframe to your needs from the Edit Filter modal.
]. You can then customze the timeframe to your needs from the Edit Filter modal. 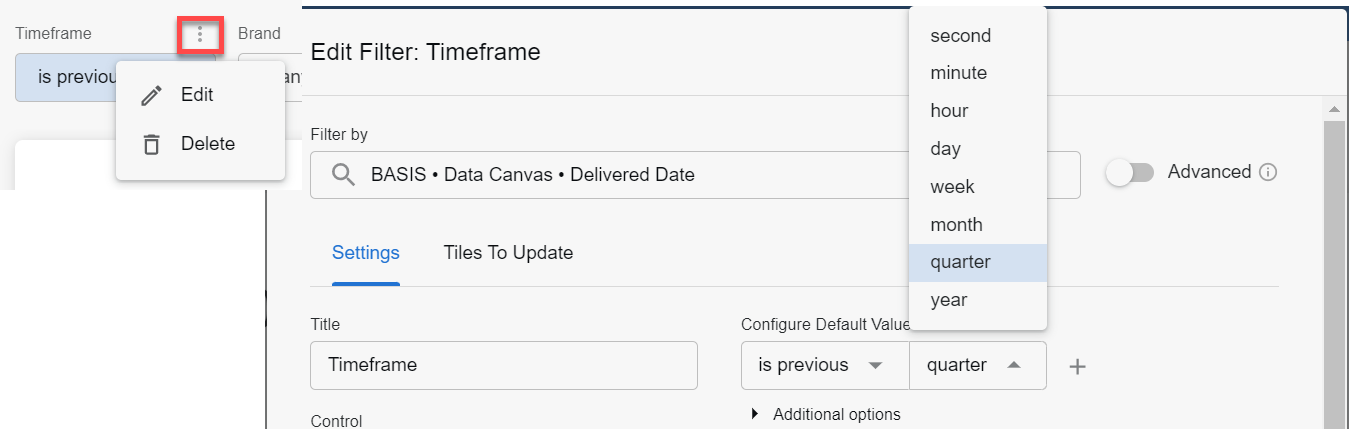
To delete a filter:
Deleting a filter cannot be undone.
-
Click Options [
] next to the filter. -
Select Delete.
-
After you delete filters, click Update in the dashboard to apply the new filter settings to the tiles.
-
Alternatively, you can select the Edit menu option, which opens the filter configuration modal. Click Delete within the filter configuration window to delete your filter.
-
Click Save in the blue toolbar to save your changes and exit edit mode.
Temporarily Changing Filter Values on Dashboards
You can temporarily change dashboard filter values to see how the data changes when using different options or selections available in the filter. Using this method does not affect anyone else's filter results and only changes the filter temporarily.
The filter must already added and applied in the dashboard to use this method, and there should be more than one option for the filter available.
The dashboard should not be in edit mode.
To temporarily change a filter value:
-
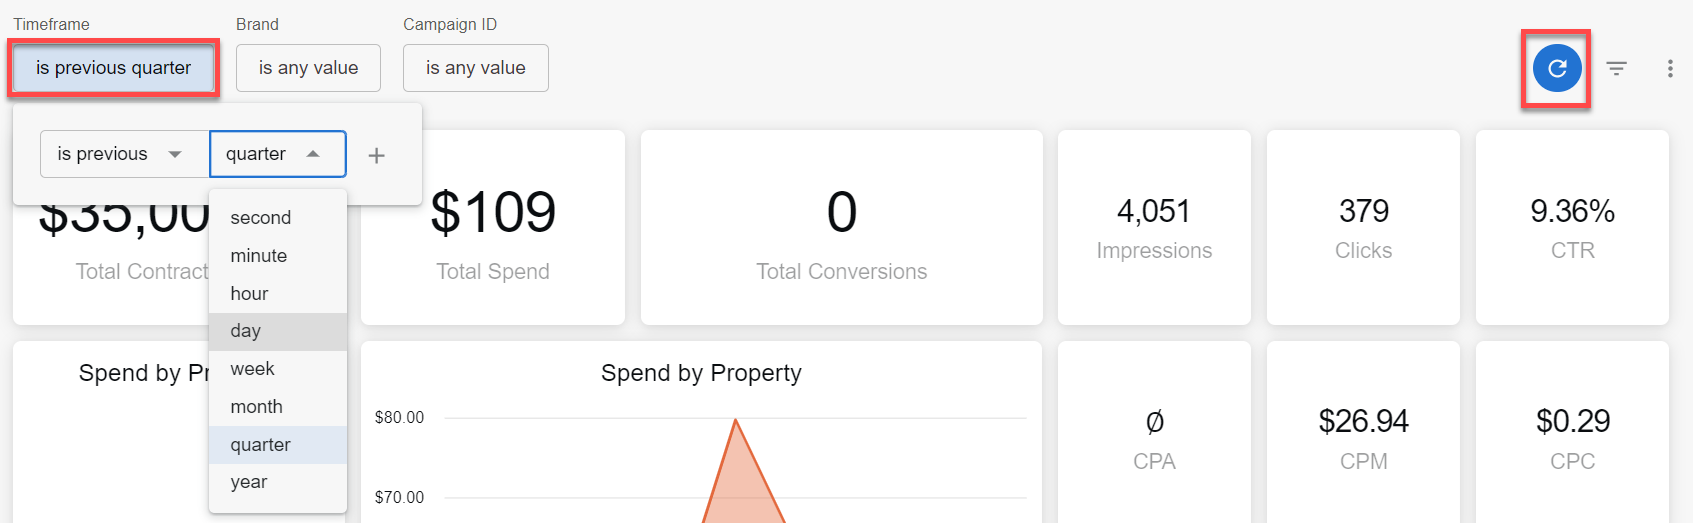
Click an existing filter on top of the screen, and select a new filter from the dropdown options.
For example, if your dashboard has a timeframe applied, click the timeframe to show a dropdown menu of preset range options.
-
After you have selected a new option, click Update to see how the filter value changes affect your data.
If you change a filter value and any tiles do not update, the filter may not currently apply to those tiles.