Creating a Naming Convention Formula
You can create naming convention formulas for individual clients or for your organization. Client-level naming conventions are restricted to one client, while organization-level naming conventions can be applied to multiple clients. Organization naming conventions are useful if you want to quickly apply a common naming convention across clients.
You cannot edit naming convention formulas after you save them. To make changes, create a new formula, and set the old formula's status to OFF. See Managing Naming Conventions for more information.
To create a client naming convention:
-
Go to Main Menu [
 ] > My Organization > Clients/Brands.
-
Select a client or create a new one.
-
Select the Naming Conventions tab.
-
Click Create.
-
Enter a Name.
-
Build your naming convention. You can use standard or custom fields.
- Use the menus to select the line item labels, such as Client ID, Vendor, or Property, that you want to use.
- Enter your custom label in the text box at the bottom of the menus and click Add to create it. There is no limit to the number of custom fields you can create.
- Click Add [
 ] to add more labels.
 - Click Delete [
 ] to remove a label.
 - Enter any symbols that you want to use as separators in the text boxes between the labels.
-
Click Save to save your naming convention formula. You can now apply this naming convention to line items in campaigns that use this client.
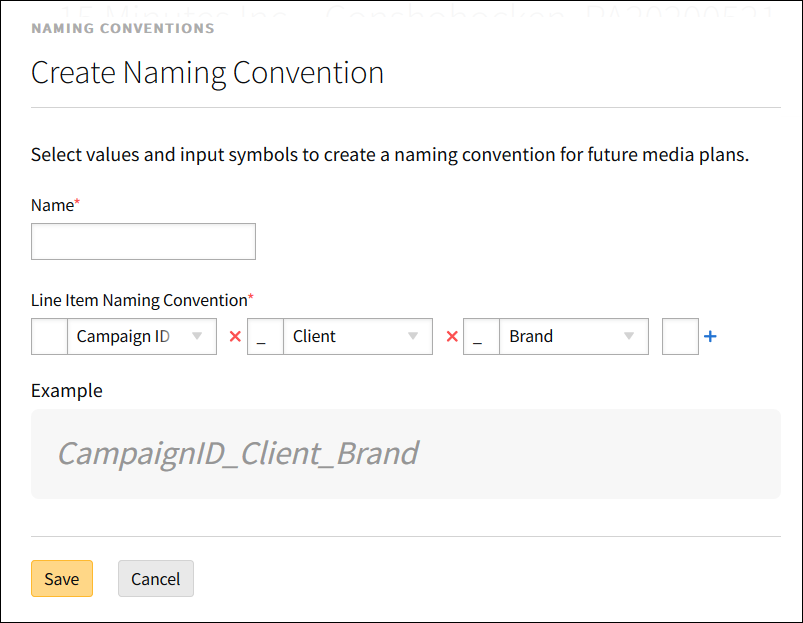
If a label can include multiple values, such as Format: Interstitial, Display, and Video, those values will be separated by a comma and a space in the naming convention: Campaign ID_Vendor_Interstitial, Display, Video_Property.
To create organization naming conventions:
-
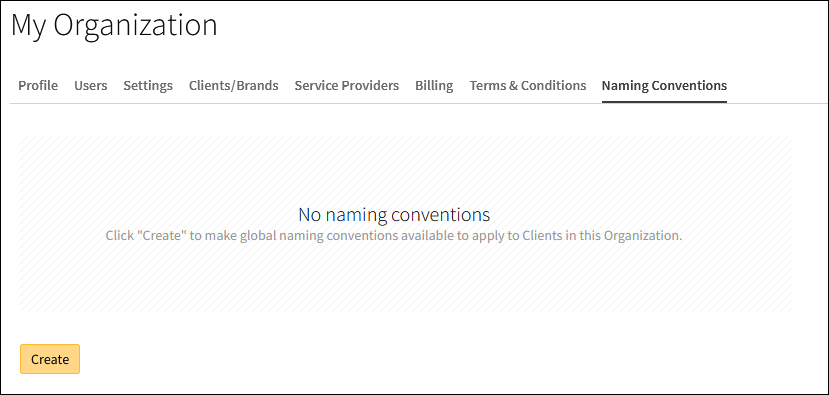
Select the Naming Conventions tab.
-
Click Create.
-
Enter a Name.
-
Build your naming convention. You can use standard or custom fields.
- Use the menus to select the line item labels, such as Client ID, Vendor, or Property, that you want to use.
- Enter your custom label in the text box at the bottom of the menus and click Add to create it. There is no limit to the number of custom fields you can create.
- Click Add [] to add more labels.
- Click Delete [] to remove a label.
- Enter any symbols that you want to use as separators in the boxes between the labels.
If a label can include multiple values, such as Format: Interstitial, Display, and Video, then those values will be separated by a comma and a space in the naming convention: Campaign ID_Vendor_Interstitial, Display, Video_Property.
-
Click Save.
-
On the Select Clients modal, click Add [
] to add the clients you want for this naming convention.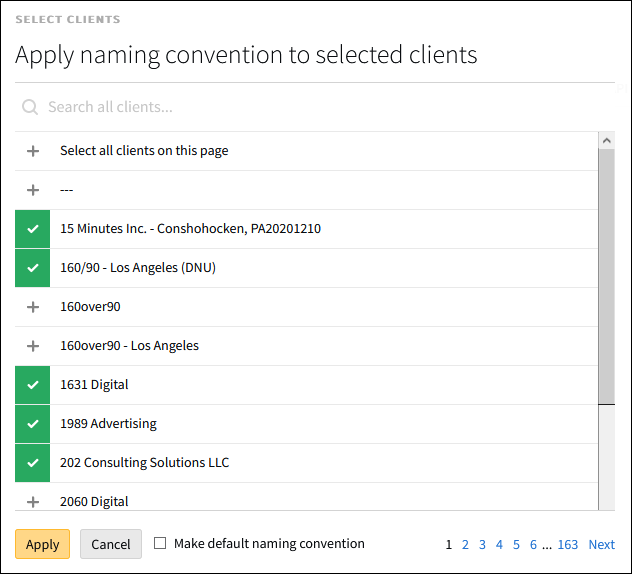
-
Add Select all clients on this page to quickly add all of the clients on the current modal.
If you go to another page on this modal, all of the clients that you selected on the previous page will be deselected. You must apply the naming convention to the selected clients on one page, then return to this screen to apply it to clients on other pages.
-
Enable Make default naming convention to set this naming convention as the default for all of the selected clients.
-
-
Click Apply to save your naming convention and apply it to the selected clients.
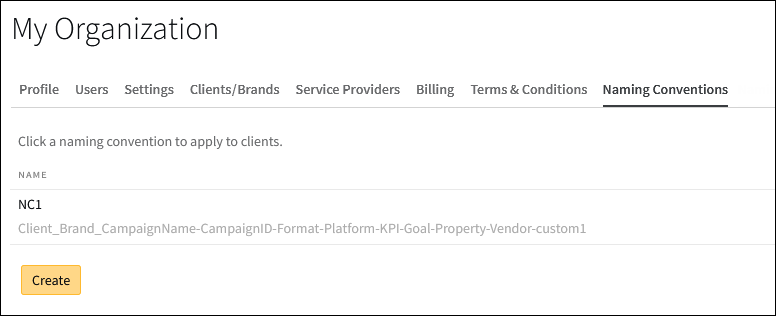
To apply a naming convention to other clients, select a naming convention on the Naming Conventions tab, add new clients, and click Apply.You can now use this naming convention in media plans for those clients.
You cannot remove the naming convention from a client after you apply it, but you can set its status to OFF at the client level. See Managing Naming Conventions for more information.