Importing Media Plans
-
Create a campaign and media plan or go to an existing one.
-
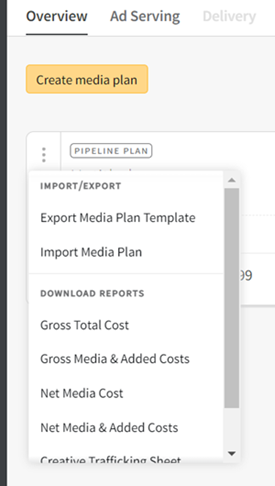
From the media plan's Options [
 ], select Export Media Plan Template.
 -
Make your media plan changes in the exported XLSX file.
-
From the media plan's Options [
], select Import Media Plan and import the updated file. -
Review your changes, and select Confirm. All changes are automatically reflected in the media plan in Basis.
-
If there are any errors, make changes in the modal or in the external file and upload again.
-
Use a media plan's export and import options to easily bulk edit, add, or delete line items in Basis.
You can start with a blank plan, or make changes to an existing plan by uploading a media plan file. Any changes made to an existing plan are automatically reflected in Basis when the file is uploaded.
Note the following when using the export and import plan feature:
-
Files can be imported for media plans in Planning, Approved, Live, or Completed status. See Importing Media Plans Post-Planning for more information on importing plans in Approved, Live, or Completed status.
-
Before importing your plan, first export the full media plan from Basis, then use this file as the template for importing.
-
If an RFP has been sent for this campaign, you can't use the import feature.
-
Markup is not supported, so if your agency uses markup, this option isn't available.
Traditional media channels aren't currently supported. Any changes made to a traditional line item in the file are ignored when uploaded.
Exporting the Media Plan Template
You must create a media plan in Basis before you can export a template. It can be an existing plan with line items, or the plan can be blank. Any existing line items are included when you export the file.
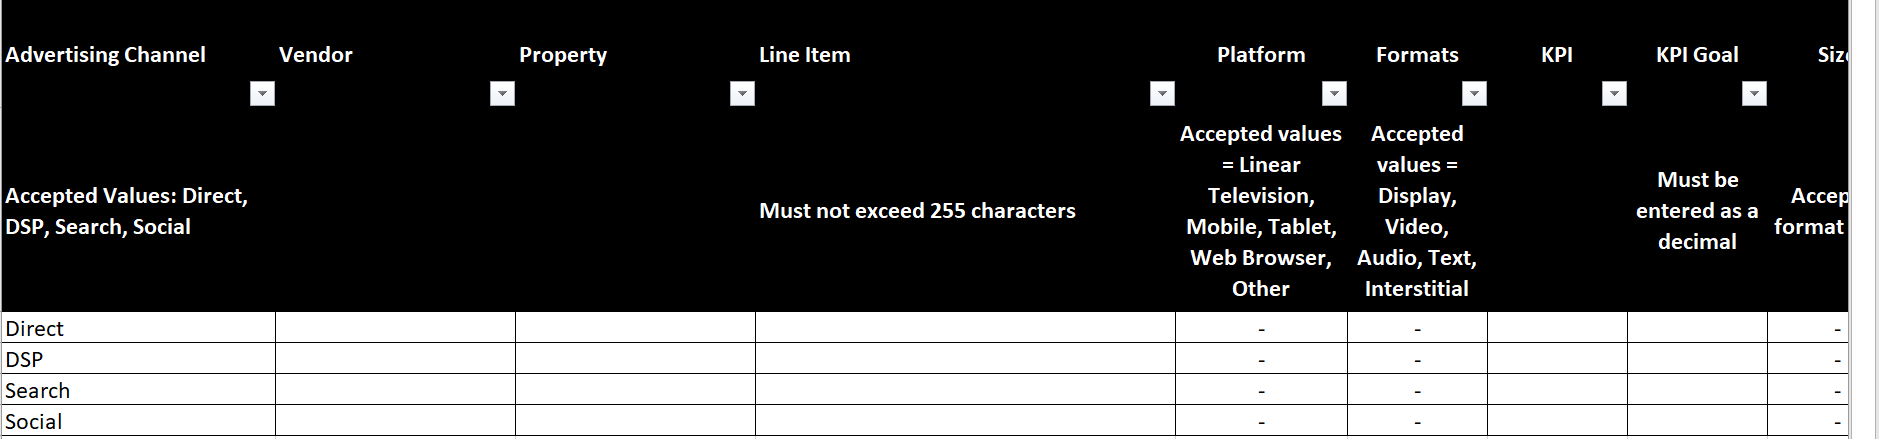
If the media plan has no line items, the first four rows contain channels for Direct, DSP, Search, and Social.
Plan with No Existing Line Items
To export the media plan:
-
Go to Main Menu [
 ] > Campaigns, then select your campaign.
 -
Select Export Media Plan Template from the media plan's Options [
]. 
-
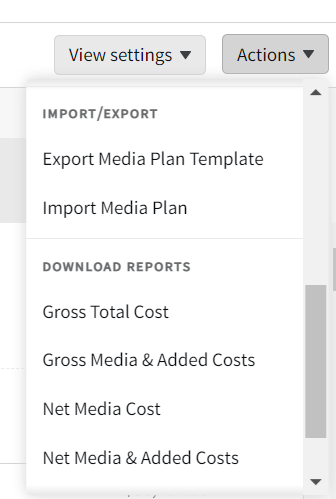
Alternatively, click in the media plan, then select Actions > Export Media Plan Template.
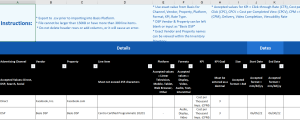
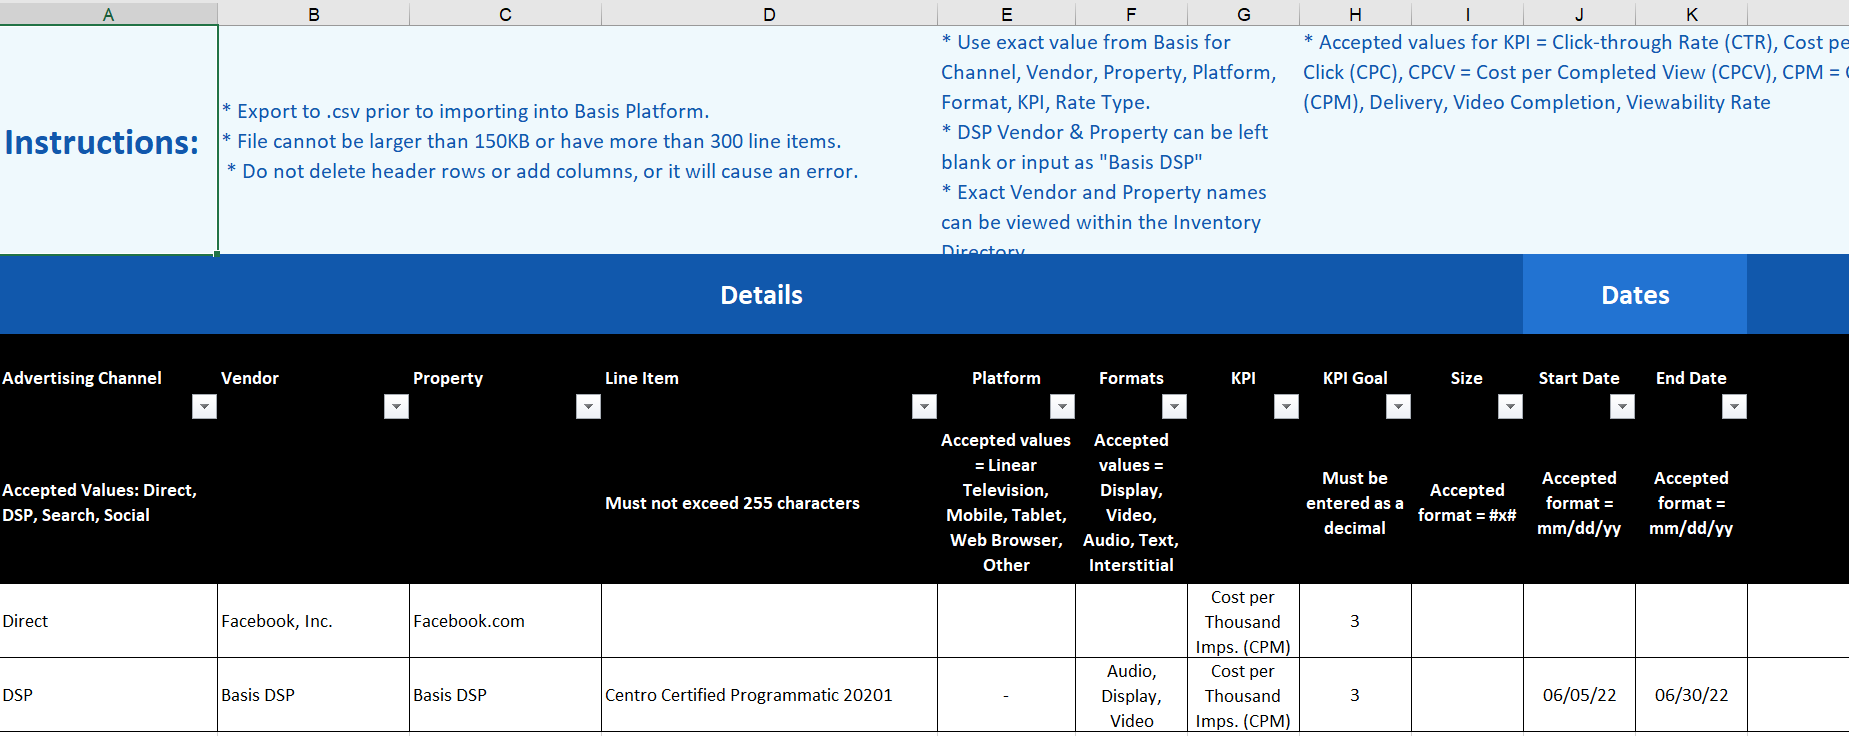
Basis exports the file as an XLSX file. You will need to use this file as the template when importing changes to your media plan.
Export File Example
-
Preparing the File for Upload
After you have exported the file, make your changes so it can be imported into the plan.
When adding or editing line items, ensure your file adheres to the format requirements. See Importing Media Plan File Specifications for more information about format requirements.
Do not edit or delete the instruction or header rows (rows 1-4) or add any columns to the file, or it will cause an error when uploading.
To prepare the file for upload:
-
Make your changes to the exported XLSX file.
The file can't exceed 150 KB and 300 line items.
-
To add a line item, create a new row within the preformatted file with at least the three following columns completed: Advertising Channel, Vendor, and Property.
-
Make sure to leave the ID column blank. The ID column is automatically populated during import.
-
-
To delete a line item, delete the corresponding row from the Media Plan Export file.
When you delete a line item, any flights under that line item are also deleted.
-
To change a line item, edit the value within a cell. Do not edit the ID column. You can't edit the Vendor or Property for an existing line item.
Flights inherit the following fields from the line item, and don't update unless they are changed in the parent line item: Name, Format, Platform, Size, KPI, Rate Type, Margin
-
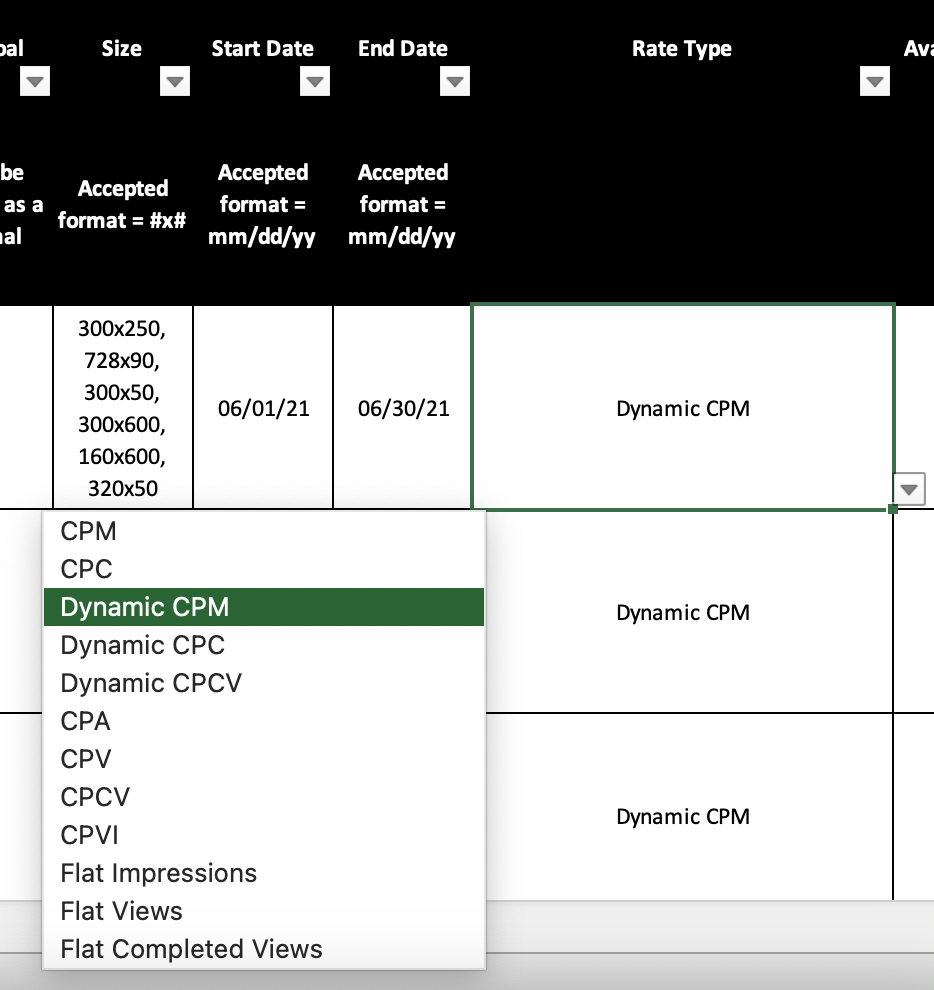
Select from the dropdown options available for the following fields: Advertising Channel, KPI, Rate Type
-
- After you have added, changed, or deleted line items, save the file. You can then import the file to Basis. The file must be in either an XLSX or CSV format to import.
If you save the file as CSV, the file loses the original formatting.
Importing a Media Plan
When you import a media plan, Basis overwrites existing line items and automatically updates the plan to reflect the changes, additions, or deletions.
To import your media plan:
- Ensure your file adheres to the file specifications.
-
Select Import Media Plan from the media plan's Options [
].
-
Alternatively, click in the media plan, then select Actions > Import Media Plan.
-
-
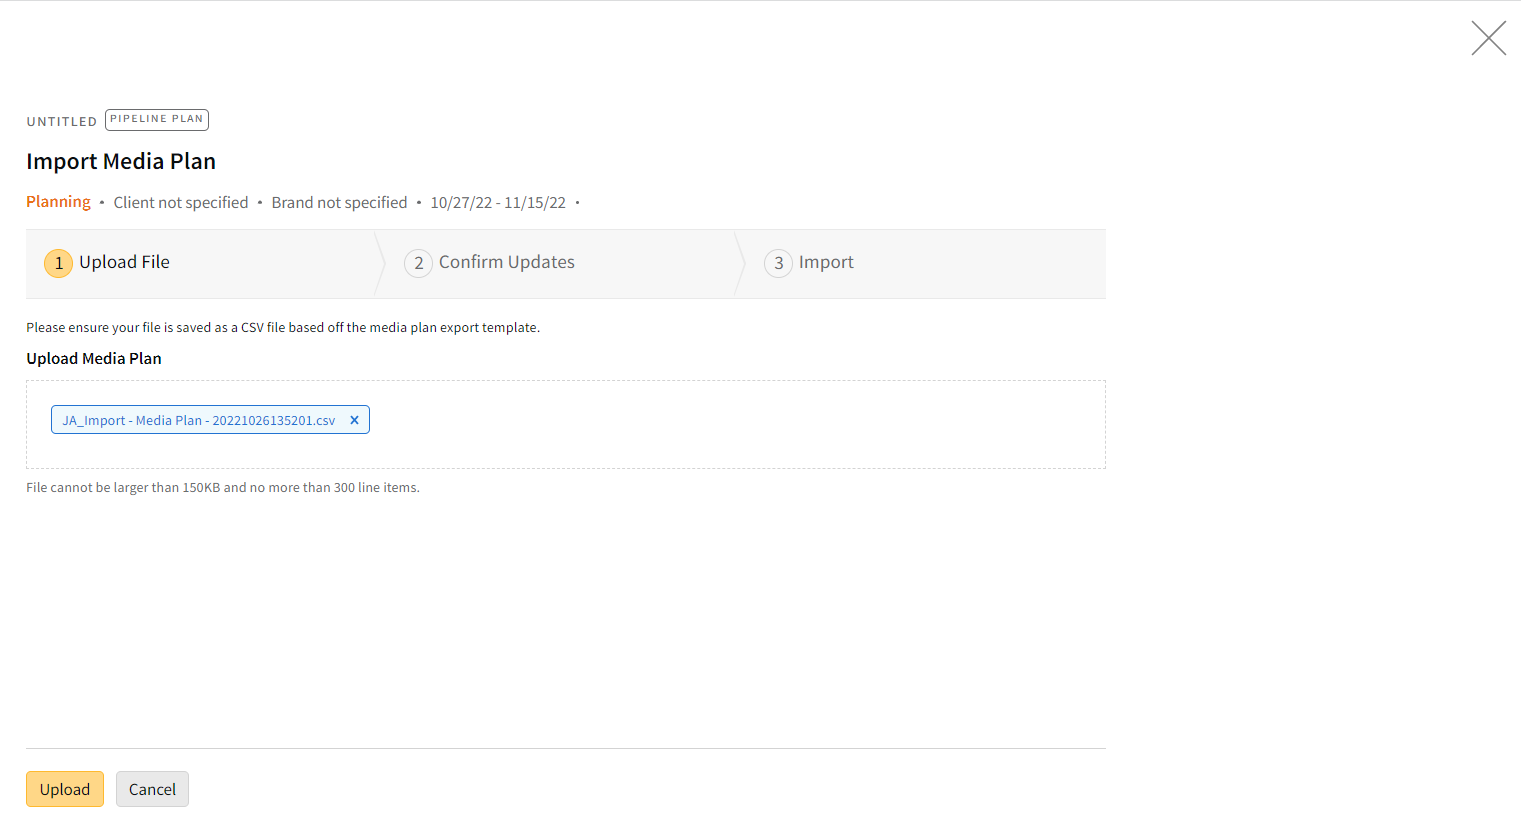
From the Import Media Plan modal, either drag and drop your file, or select browse to choose a file.
- Select Upload.

A progress bar appears letting you know the file is being uploaded and confirms the update. If the file is not in an accepted format, you'll receive an error message.
Only one file can be imported for a media plan at a time. If you select Upload while an import is in progress by another user, you will receive a message that an import is already in progress.
-
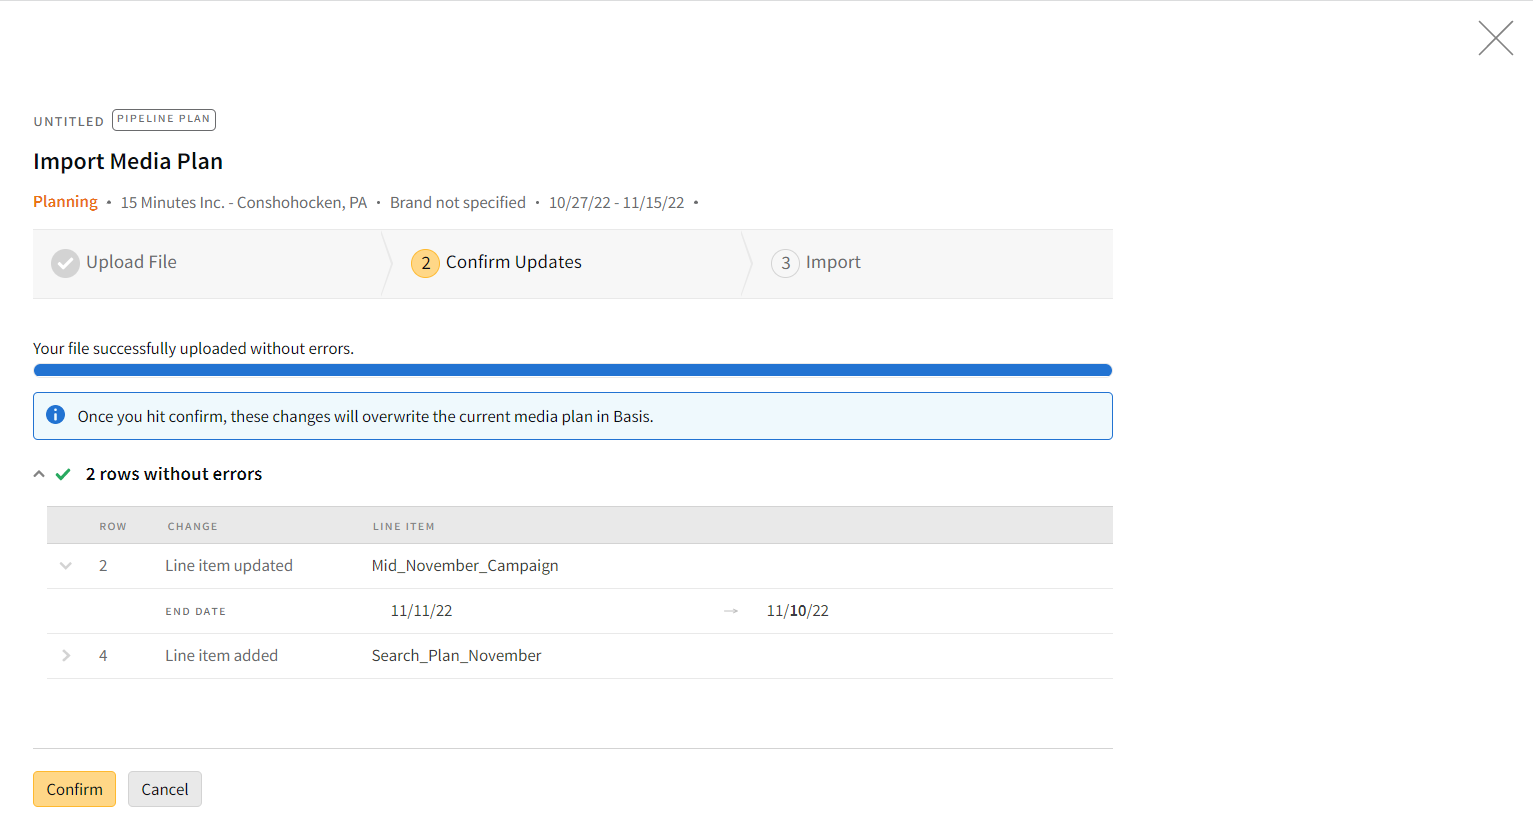
After the file is successfully uploaded, a list of changes to your media plan appears. Review your changes. You can select the arrow next to the row of changes to see more details.
-
If there are errors in any of the line items, such as improperly formatted fields, error or warning messages appear detailing the row and reason for the errors. For errors, you can either fix the errors in the error modal, or in your file, then re-upload the file. See Warnings and Errors for more information.
-
If you select Cancel, none of your line item changes are saved.

-
-
Select Confirm.
After you have confirmed your changes, the plan is imported into Basis.
After you select Confirm, the import can't be canceled and all changes will be made to the planning grid.
Please note that it may take a few minutes to finish importing. You can close the modal while the plan is imported, and you will receive a confirmation message when the import has been completed successfully.
You can't upload another file while your file is uploading.
-
Refresh the page or open your media plan again to view the changes.
Importing Media Plans Post-Planning
When importing media plans post-planning, some fields may be locked after a line item has gone live—the current date is on or after the line item start date—or the line item has been exported to an ad server. You receive an error message if you try to make changes to locked fields. See Line Item Revisions - Field Table for more information about these fields.
To import changes to Direct, Search, and Social line items for media plans in Approved or Live status, you must first create a revision, then import your changes to the revision.
You can import a media plan to add or edit DSP line items in an Approved or Live plan as part of the revisionless workflow, even if it contains other channels, as long as no revisions exist. However, if any changes are made to Direct, Search, or Social line items, these changes are ignored during import.
Ad Serving Placements
Note the following when importing line items with ad serving placements:
-
If a line item is deleted and ad serving placements have already been created, all linked ad serving placements are also deleted.
-
If an ad size is removed from the line item and an ad serving placement exists for that ad size in the line item, the ad serving placement for that ad size is deleted.
-
If a line item already has ad serving placements generated and a new ad size is added, the new ad serving placement for this size is automatically created.
Importing DSP Line Items
Note the following when importing DSP line items post-planning:
-
The line item media cost must align with the group and tactic level budgets. This means that the group-level budget must be equal to or less than the Media Cost of the line item.
-
The line item Start and End Dates must align with the group and tactic start and end dates. This means that the group start date can't be before the line item start date, and the group end date can't end after the line item end date.
-
Any changes made when importing a media plan are reflected on the DSP History tab, including the date the import was made, the user who imported the changes, and details of changes made.
DSP line items can't be deleted after a media plan is approved and the start date has past. You can only delete DSP line items that are not live yet.
Warnings and Errors
Warnings
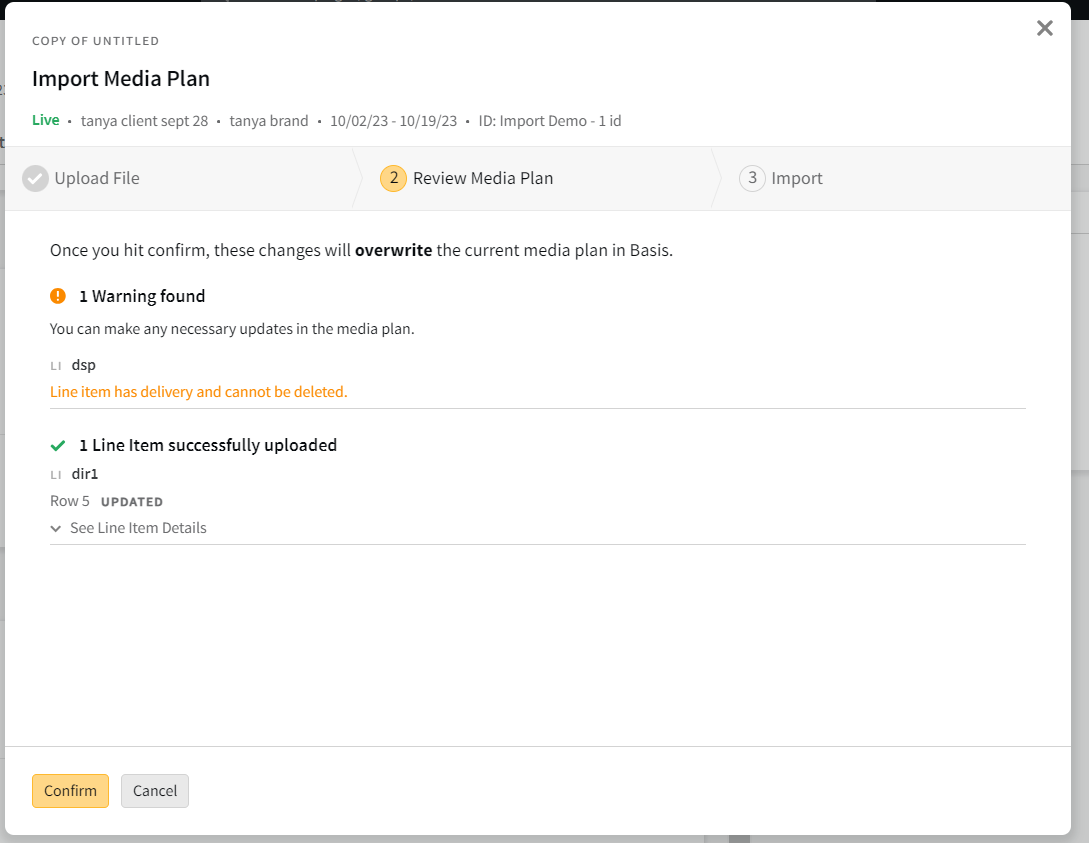
Warnings appear when your file contains updates that are not allowed, or do not fit within the parameters of the planning grid, but you will still be able to proceed with importing the file. However, some line items or fields may not update when the file is imported.
For example, if you delete a line item in your file that has delivery, you can still complete importing changes, but that line item will not be deleted.
If you receive only warnings and no errors, you can continue importing the file. Make sure to review the warning messages, and then make any applicable changes in the media plan.
Errors
Errors appears when you make critical updates to the media plan that are not allowed, or when required fields are left blank. You will not be allowed to import the file until the errors are fixed. You can fix errors in the XLSX file, or directly in Basis in the Error modal.
If you receive a mix of error and warning messages, only errors can be corrected in the Error modal. You can make any applicable changes for warnings in the media plan.
When there are errors, the Error modal appears and lists all the errors with a textbox next to each. Make your corrections in the textboxes.
For example, if you enter a Vendor and Property that is not recognized in Basis, you will have to enter an accepted Vendor and Property before the file can be imported.
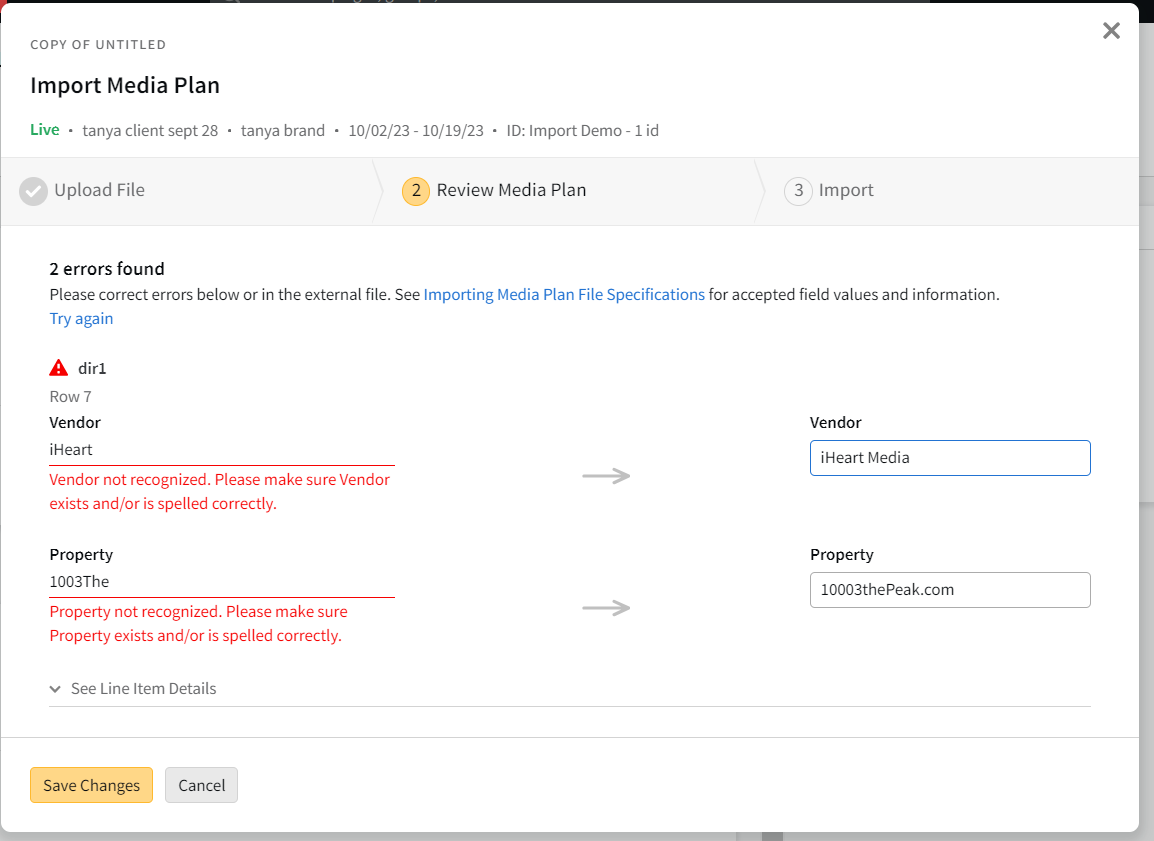
You can leave fields that are not required blank by selecting the Leave blank or revert to previous value checkbox.

When finished, select Save Changes to continue importing.