Using Facebook Quick Reference Guide
Facebook / Basis Key
-
Campaign = Basis Line Item; Facebook Objective
-
Ad Set = Facebook Targeting Segment
-
Ad= Creative
Basis has a one-way API integration with Facebook to receive delivery, performance, and spend data, so you can easily report on campaign data from one place. Data from the Facebook campaign is stored in the line item and is what is surfaced in Basis. In Facebook, budgets are set at the ad set level. In Basis, the budget is shown against the line item / campaign.
After you have created your campaign in both Facebook and Basis, you can add the line item for the Facebook objective in Basis. When the campaign is live, you can then map the delivery source to the line item, so you can generate reports and view the data metrics in Basis Analytics.
Best Practices
-
You should have one line item in Basis that includes all your Facebook ad sets, as there can be multiple ad sets per Facebook campaign. Since budgets are set at the ad set level in Facebook, optimizations that occur at the ad set level would shift budgets between ad sets based on performance, or pause low performing ad sets.
-
Facebook should be set as an Insertion Order (IO) Optional vendor, so insertion orders are not required before the plan can be approved. When placing buys in self-serve programs such as Facebook, you are required to place the buy directly in the platform, so there is no vendor to accept the IO, and the billing information does not populate in the Analytics screen.
Before You Begin
The Facebook account must be a manager account with API access enabled.
To connect your account:
-
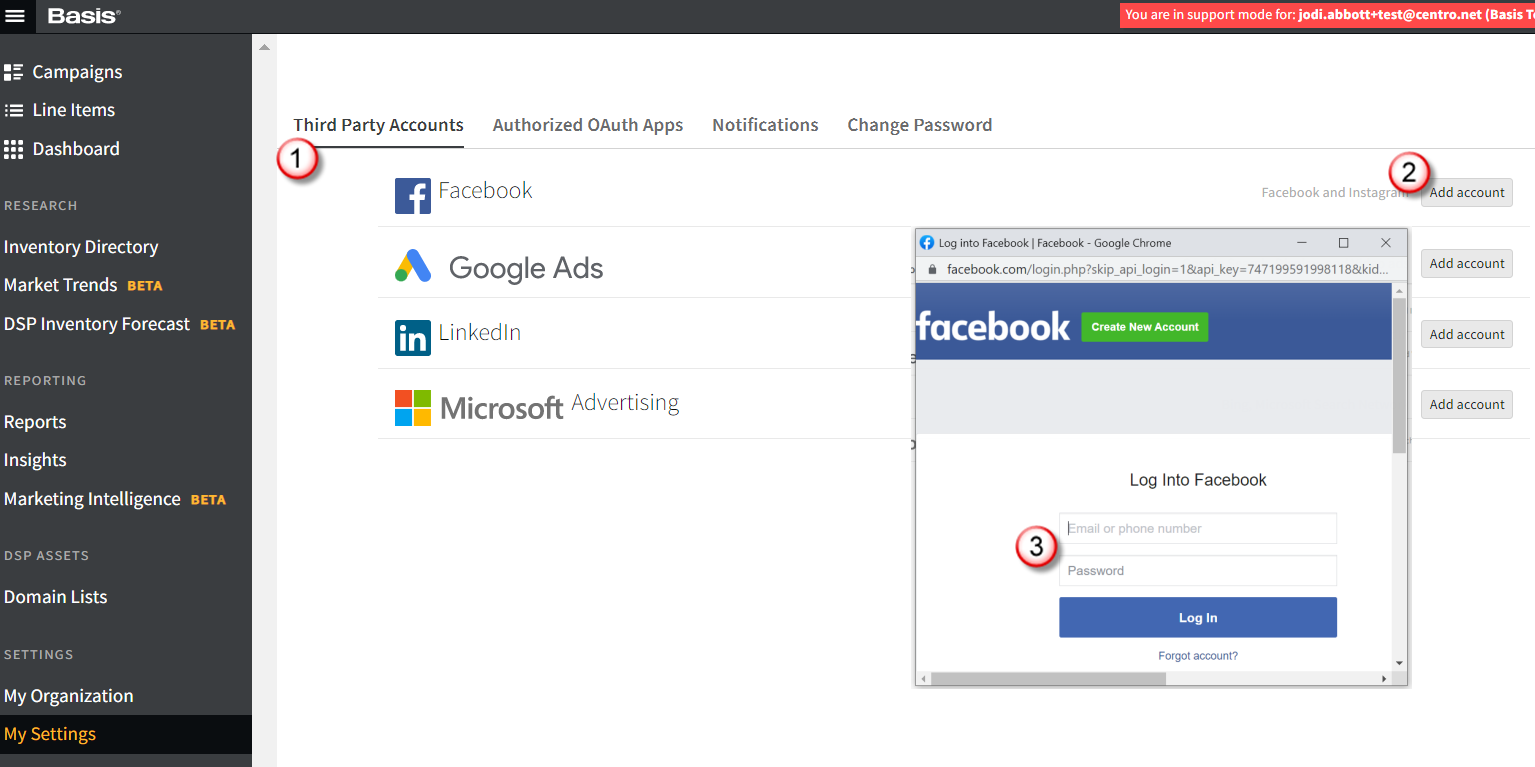
Go to Main Menu [
 ] > My Settings and select the Third Party Accounts tab.
- Click Add Account next to Facebook.
-
Enter your credentials to sign in and add your account. Your credentials are stored.
If you are unable to add accounts, make sure you have Organization Management permissions to add accounts, and Delivery Source Management permissions to configure them.
To set Facebook as an IO Optional vendor:
-
Go to Main Menu [
 ] > Inventory Directory.
 -
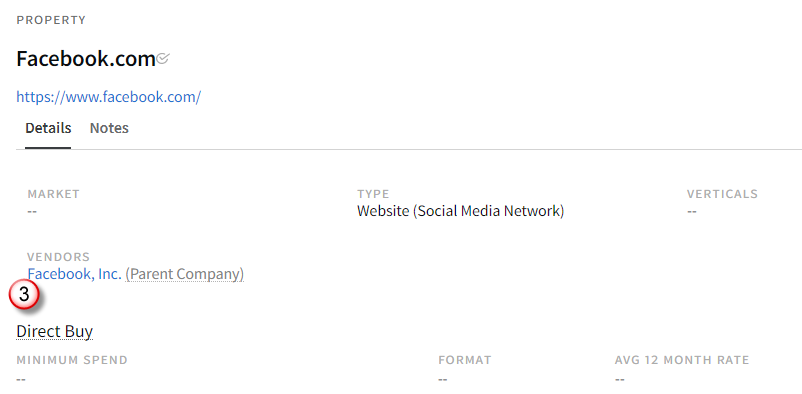
Select the property (Facebook). You can use the search bar to search for the property.

-
Select the vendor.
-
From the Payee tab, select Optional under Insertion Order. You can also select Not Applicable for self-serve platforms that do not follow the standard IO process, so insertion orders are not sent to the vendor.

Create your campaign in Facebook and Create a campaign in Basis
It does not matter which order you create your campaigns, as long as they are in both Facebook and Basis.
Using Facebook in Basis
Add a Line item for Your Campaign
Add a Social line item for each Facebook campaign. Reminder: In Basis the Line Item is the Facebook Campaign Objective. You should include all the Facebook ad sets in one line item.
To add a line item for your campaign in Basis:
-
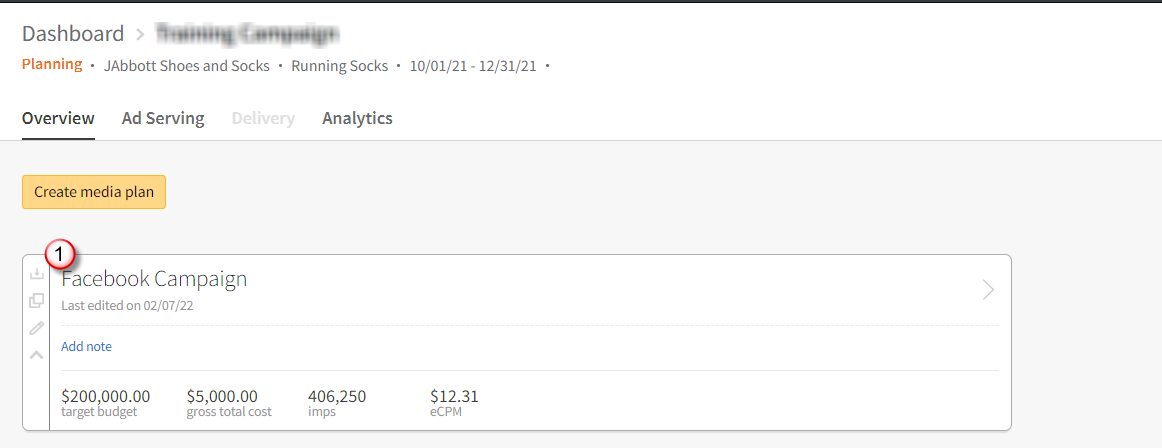
Go to your Facebook campaign in Basis, and click in the media plan.
-
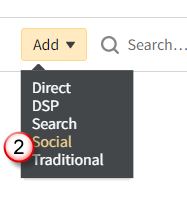
Click Add > Social.
-
Click Add Properties to open the Inventory Directory.

-
Click Add [
 ] next to Facebook.com. A green check mark appears confirming it has been added to the plan. Click Delete [
 ] to close the modal.
If the property is set to Optional IO, the Select Contact modal appears. Click Add to Plan without a contact. You are not sending an IO, so a contact is not necessary. If the vendor is set to Not Applicable, this modal does not appear.

-
Click Edit in the Media Plan.

-
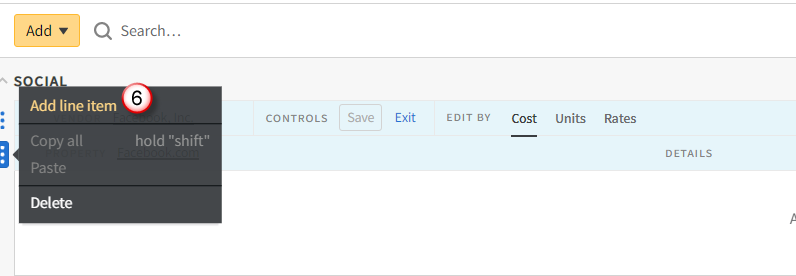
Click the Options [
 ] menu next to Property, and select Add line item.
-
For all of the column fields, enter the same information you entered for the campaign in Facebook. Complete the Ad Serve field last.
-
Click Save to save the line item.

Approve Campaign with Optional IO
Approve the Facebook campaign without requiring an IO. Since buys are placed directly in Facebook, there is no vendor to accept the IO.
To approve a campaign with an optional IO:
-
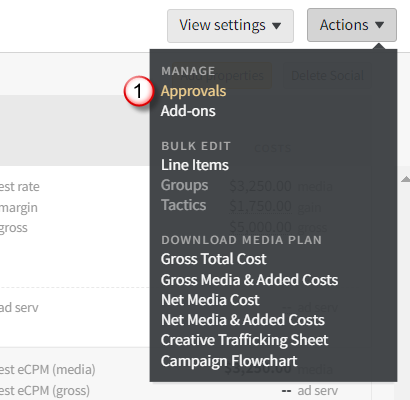
Open the media plan and select Actions > Approvals to open the Approvals panel.
-
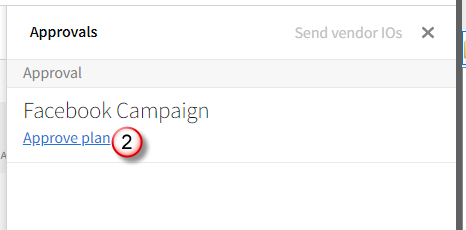
Click Approve Plan.
-
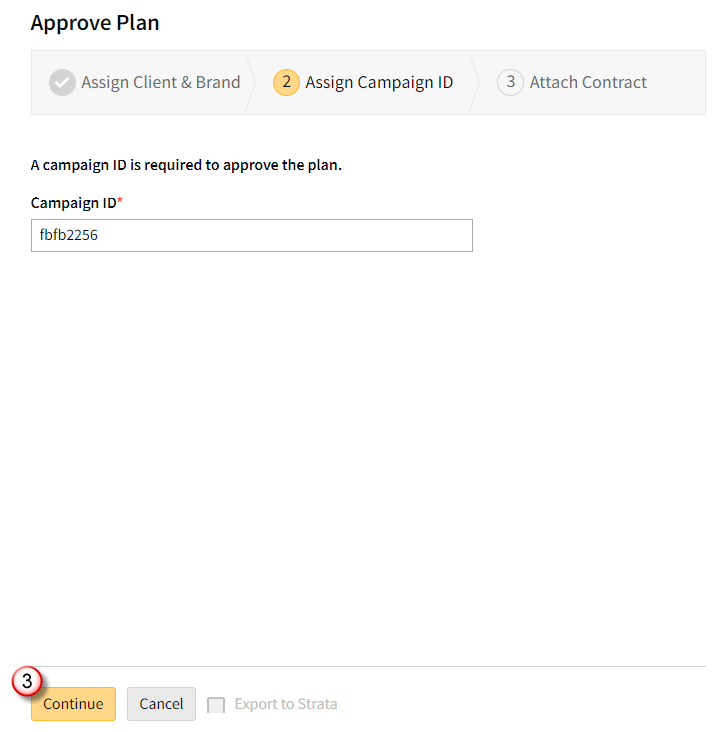
Enter the Campaign ID, and click Continue.
-
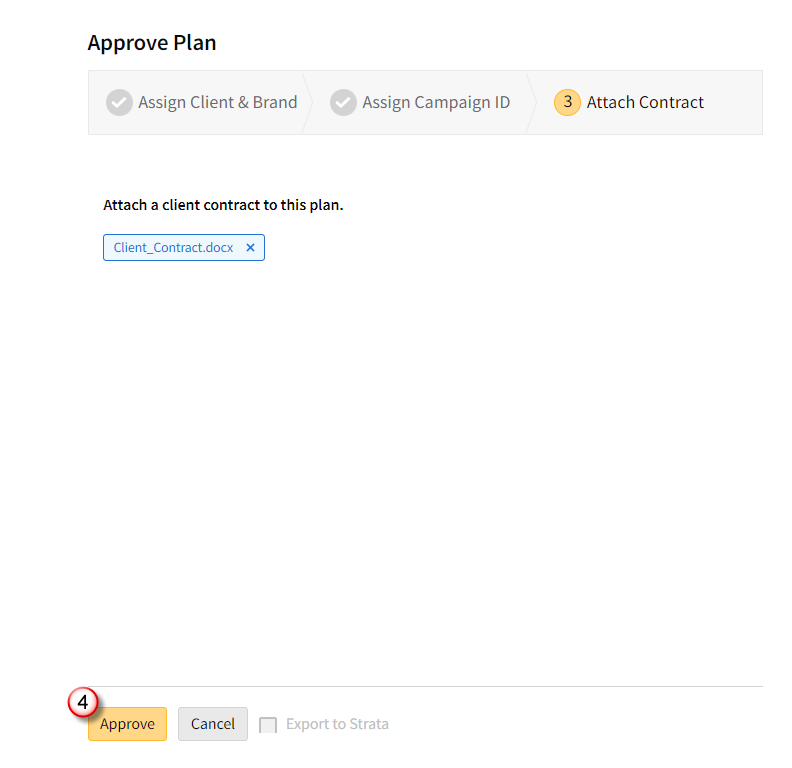
Upload the client contract and click Approve.
-
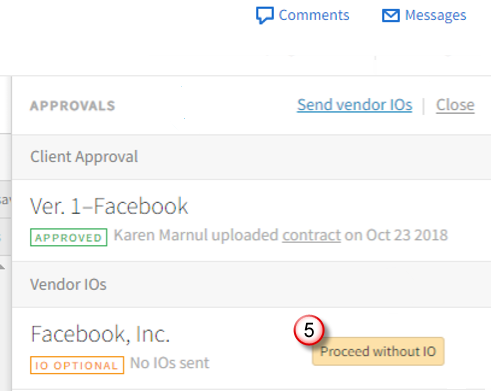
Click Proceed without IO.
-
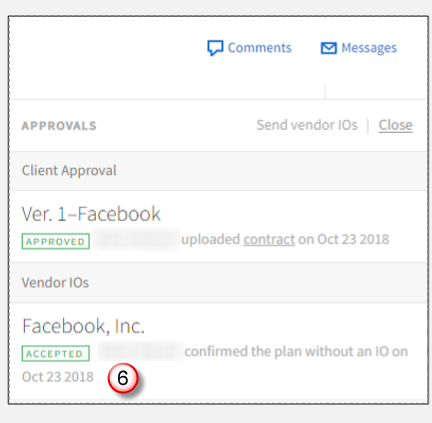
Basis shows a timestamp with the date and the user who selected Proceed without IO.
Map Delivery Sources
After a campaign is live, map the delivery sources so you can track performance metrics for reporting. For more detailed information on managing your delivery sources, see the Managing Delivery Sources Quick Reference Guide.
To map delivery sources:
-
Open your campaign and select the Delivery tab.
-
Click Link Sources.

-
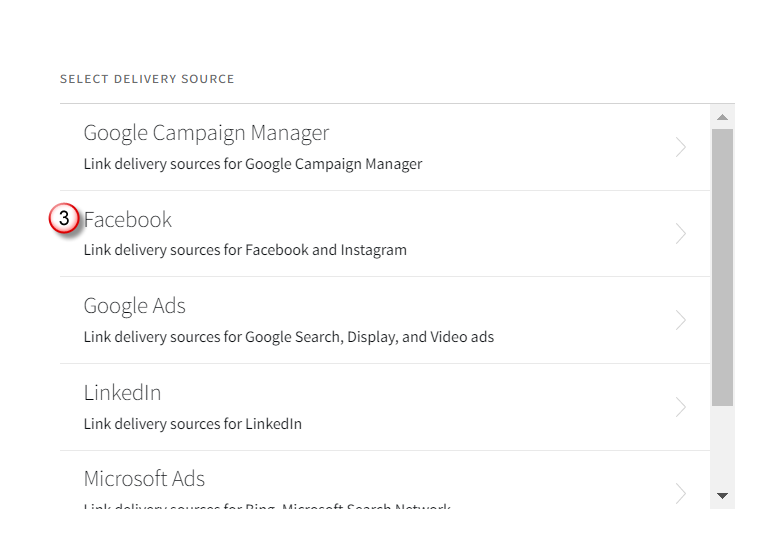
Select Facebook.
-
Select an account.
-
Select the ad account.
-
Click Add [
 ] to select the campaigns or Select all to select all campaigns, then click Import.
-
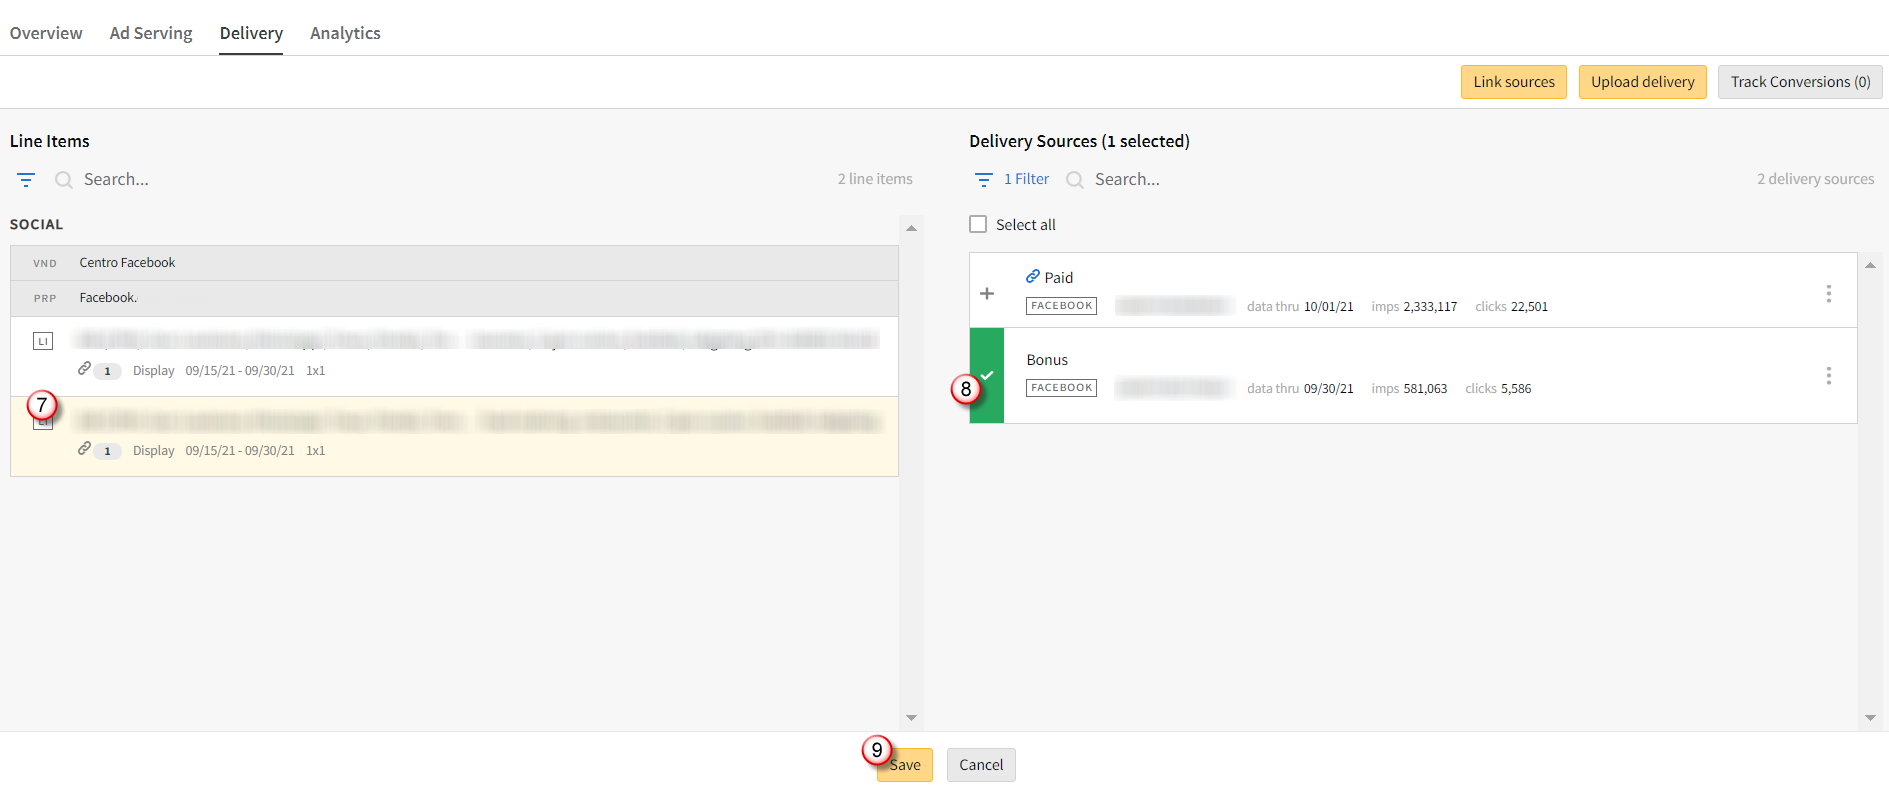
The sources appear on the Delivery tab. Select the Facebook campaign line item from the list.
-
Click Add [
 ] next the delivery source to map it to the selected line item, or select the checkbox at the top of the list to map all sources.
 -
Click Save.
-
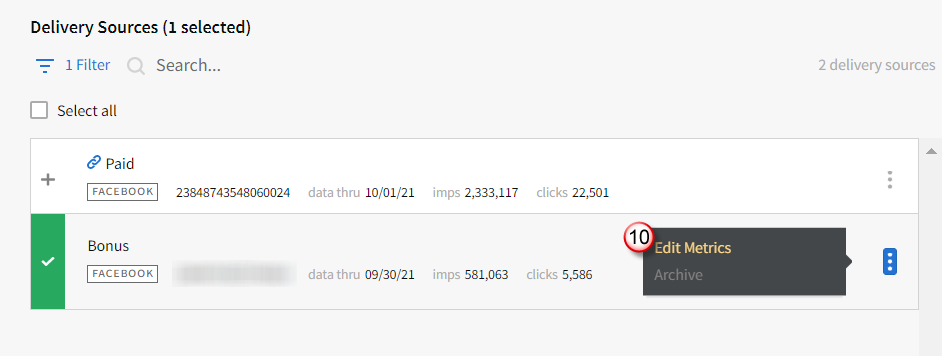
Select Edit Metrics from the Options [
 ] menu next to the delivery source.
-
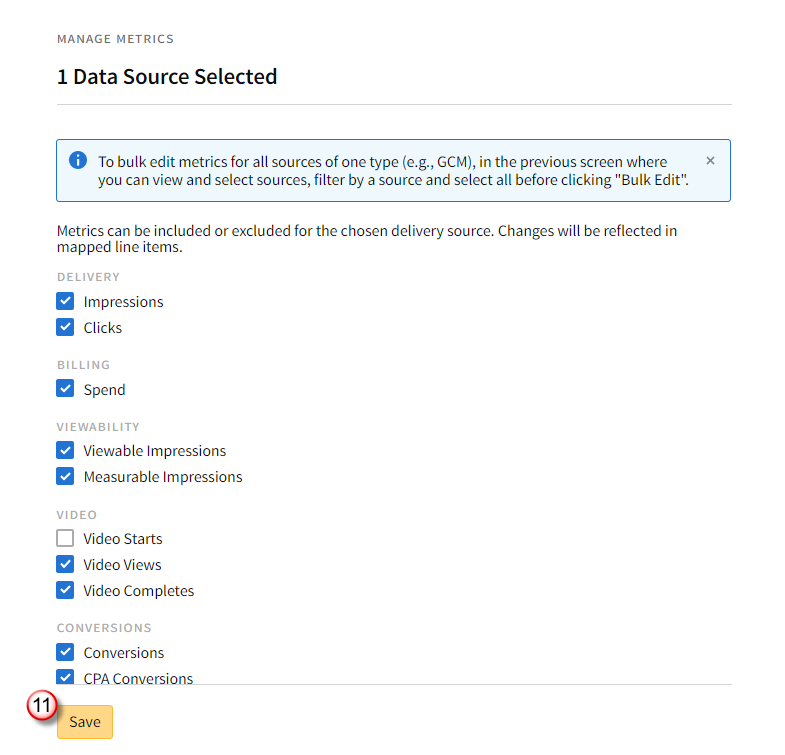
Select checkboxes next the metrics you want to count toward delivery, then click Save.
Next Steps:
Reporting
The one way API connection allows you to view various Facebook campaign metrics in Analytics, Basis’ Creative Report, and Insights. The Creative Report breaks out reporting per ad set in the Ad column.
The following social metrics are reported in Basis:
| Analytics Grid | Creative Report | |
|---|---|---|
|
|
|
Insights Reporting
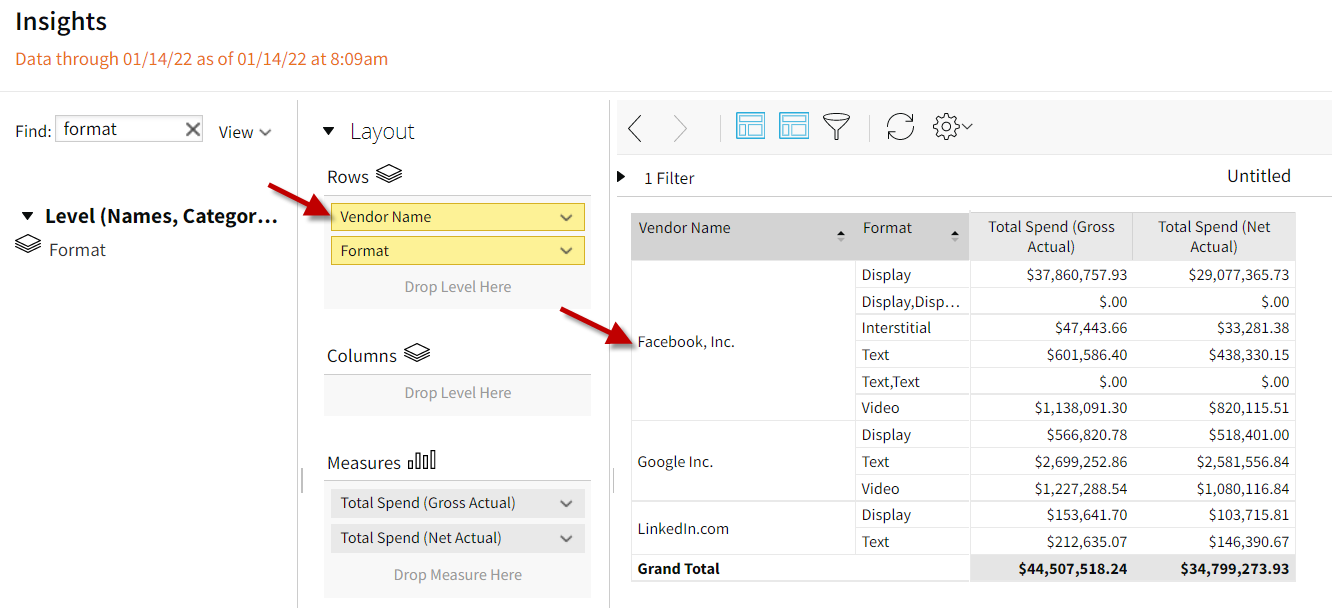
To add Facebook to your Insights report, add Vendor Name as a row or column in your layout.
