Uploading Native Ads
![]()
Check out our AdTech Academy Course to learn more!
Add new creatives to the DSP from the Creative panel or the tactic editor.
Native ads seamlessly integrate advertising into the context of the placement. Unlike traditional HTML or JavaScript ads, native ads specify ad content but not how to show it. Publishers integrate native advertising into news feeds and other core site elements, giving advertisers higher quality inventory to choose from.
See Bulk Uploading Native Ads for information about uploading more than one native ad at once.
To upload a native ad:
-
Go to Main Menu [
 ] > Campaigns.
 -
Select the campaign and media plan.
-
Select DSP Actions > Creative.
-
Select Add > Native on the Creative panel.
-
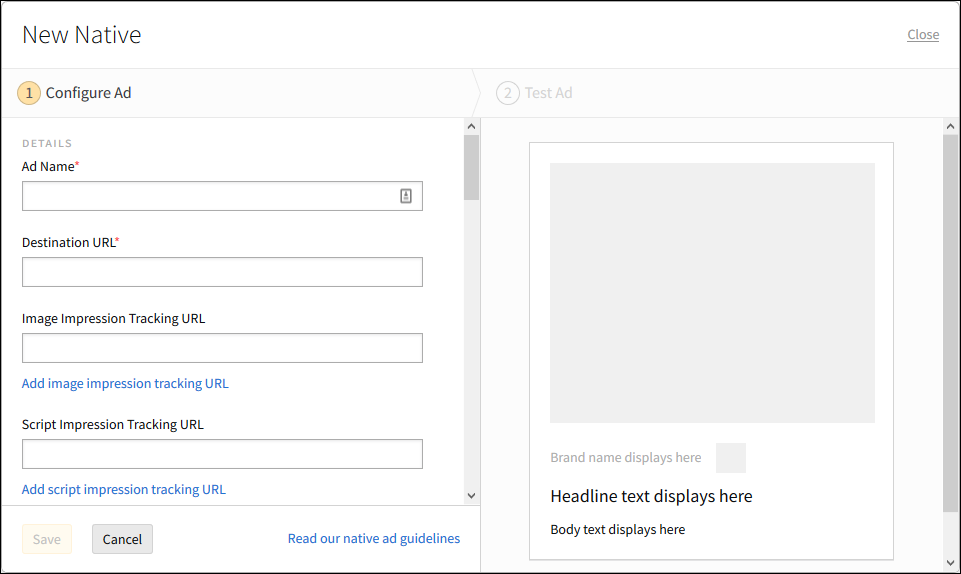
Enter the creative's details on the Configure Ad tab:
-
Ad Name: Enter the creative's name (maximum 150 characters). Use a descriptive name that you'll recognize when you have many creatives in the DSP.
-
Destination URL: Enter the address of the landing page that the ad clicks through to. This address often points to an intermediate tracking server, which in turn sends the user to the landing page.
-
For URLs, include the https:// prefix.
-
For click-to-call tactics, use "tel:" followed by the phone number, including the country and area codes, such as tel:14165551234.
-
-
Image Impression Tracking URL(Optional): If you're using a third-party impression tracker, enter the image tracking URL to track impressions for the ad. If you have more than one, click Add image impression tracking URL. You can add up to three image trackers. The DSP automatically tracks impressions for your ads even if you don't provide a URL.
-
Script Impression Tracking URL(Optional): If you have ad tag support, you can also add up to three script tracking URLs. You can only use script trackers with HTML5, Image, and Native ads. See Script Tracking URLs for more information.
-
SSL Status: If the creative and all of the trackers that it uses meet the requirements for secure environments, select SSL secure.
Make sure that you declare the ad's SSL status appropriately. The DSP uses this status to decide if the ad can be used for ATS-compliant impressions, and if you mark an ad that contains non-secure elements as secure, it may not render correctly. See ATS Compliance for more information about testing ads for ATS security.
-
Upload Image: Attach the image file that you want to upload. Make sure that it adheres to our Ad Specifications recommendations.
-
Upload Logo (Optional): Upload the advertiser logo that you want to include with your native ad. We recommended an aspect ratio of 1:1.
-
Ad Text: Enter the brand name, headline, and body text for the ad:
-
Brand Name: The name of the brand that appears on the ad.
-
Headline: This text is usually larger and captures the most attention. If you enter more than 25 characters, this text may be truncated.
-
Body: Less dominant text that serves as the ad copy. If you enter more than 140 characters, this text may be truncated.
-
-
Brand Domain: Enter the domain that represents the brand. When you add a domain for the first creative that you upload for a brand, it becomes the default domain for any new creatives that you upload for that brand. See our FAQ section on Brand Domains and Verticals for more information.
-
Brand Verticals: Select the categories that best represent the ad. When you add verticals to the first creative that you upload for a brand, they become the default verticals for any new creatives that you upload for that brand. See our FAQ section on Brand Domains and Verticals for more information.
If you are creating a political campaign, you must select Sensitive Categories > Political (Elections). When you select this vertical, additional fields for political ad details appear. See Uploading Political Ads for more information.
There are limits to tracker support with native ads. See Impression Tracking URLs for information about these limitations.
-
-
Select Save, then select Close to return to the Creative panel.
After uploading a creative, make sure it works correctly, then link it to a tactic. See Previewing Creatives and Linking Creatives to a Tactic.